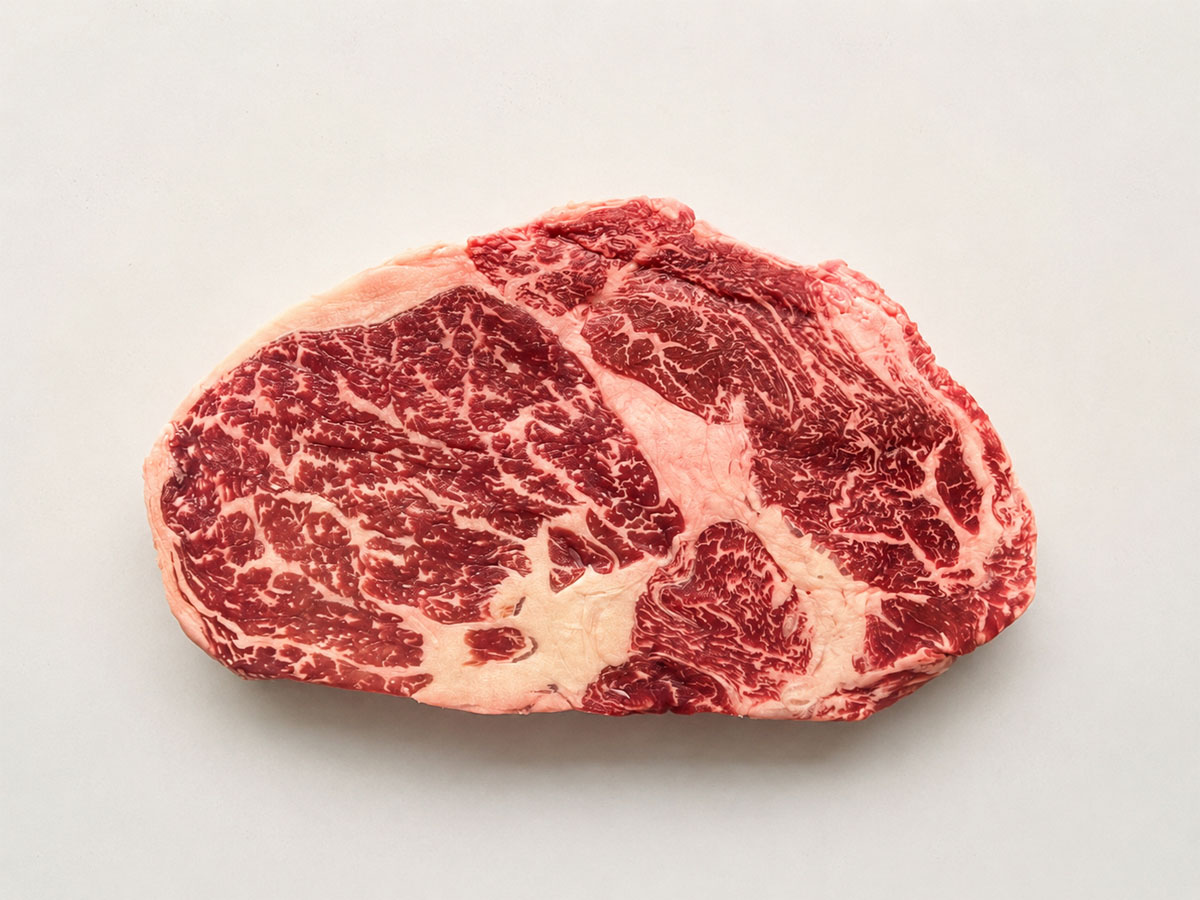

There’s no one best way to cook a ribeye. The right method depends on the steak’s thickness, the crust you want, how evenly you want it cooked, and the equipment you’re using. In this guide, I’ll walk you through six of the most popular ways to cook a ribeye steak, go over the pros and cons of each, and explain when each method works best.
Ribeye Steak Cooking Methods at a Glance
| Method | Best For | Recommended Thickness | Cook Time |
| 1. Direct pan-searing | Fast cooking and a deeply browned, flavorful crust | 0.5-1.5 in / 1.3-3.8 cm | About 4-6 min for a 1-in / 2.5-cm ribeye steak, medium-rare |
| 2. Reverse searing | Thick steaks cooked evenly from edge to edge | 1.5-2+ in / 3.8-5+ cm | About 1 hour total for a 2-in / 5-cm ribeye steak, medium-rare |
| 3. Forward searing | Cooking thick steaks in less time | 1.5-2+ in / 3.8-5+ cm | About 30 min for a 2-in / 5-cm ribeye, medium-rare |
| 4. Sous vide | Cooking to the exact internal temperature every time | 1.5-2+ in / 3.8-5+ cm | About 4 hours total for a 2-in / 5-cm ribeye steak, medium-rare |
| 5. Direct grilling | Smoky flavor and cooking outdoors | 0.5-1.5 in / 1.3-3.8 cm | About 6-8 min for a 1-in / 2.5-cm ribeye, medium-rare |
| 6. Oven broiling | Fast cooking using only the oven | 1-2 in / 2.5-5 cm | About 8-12 min, depending on thickness and target doneness |
Best Cooking Method by Steak Type
- Thin to standard ribeye (about 1/2 to 1 1/2 inches / 1.3 to 3.8 cm): These steaks cook quickly, which means there’s only a short window to get a good sear before the center goes too far. Your best bet is high, direct heat: either a very hot skillet or a hot grill. Both methods let you brown the outside fast while keeping the center pink.
- Thick ribeye (over 1.5 inches / 3.8 cm): A steak this thick needs both low and high heat if you want it cooked evenly from edge to edge. The low-heat stage cooks the steak evenly through the center, while the high-heat stage is mostly about getting a good crust. Reverse searing, forward-searing, and sous vide all rely on this same low-heat/high-heat combination.
- Dry-aged ribeye: Choose the cooking method based on thickness, just as you would with any other ribeye. The main thing to keep in mind is that dry-aged steaks cook a little faster, so plan on a slightly shorter cooking time and start checking the internal temperature earlier than you would with a regular ribeye.
- Bone-in ribeye: The bone can make it harder to get an even sear because part of the steak may not sit flat against a skillet or other cooking surface. If a deep, even crust is your top priority, grilling is a great option. For thick bone-in ribeyes, use a two-zone or reverse-sear setup rather than cooking them entirely over direct heat. Otherwise, just about any cooking method will work well.
6 Ways to Cook Ribeye Steak
1. Direct Pan-Searing
(Best for: Fast cooking and a deeply browned, flavorful crust)
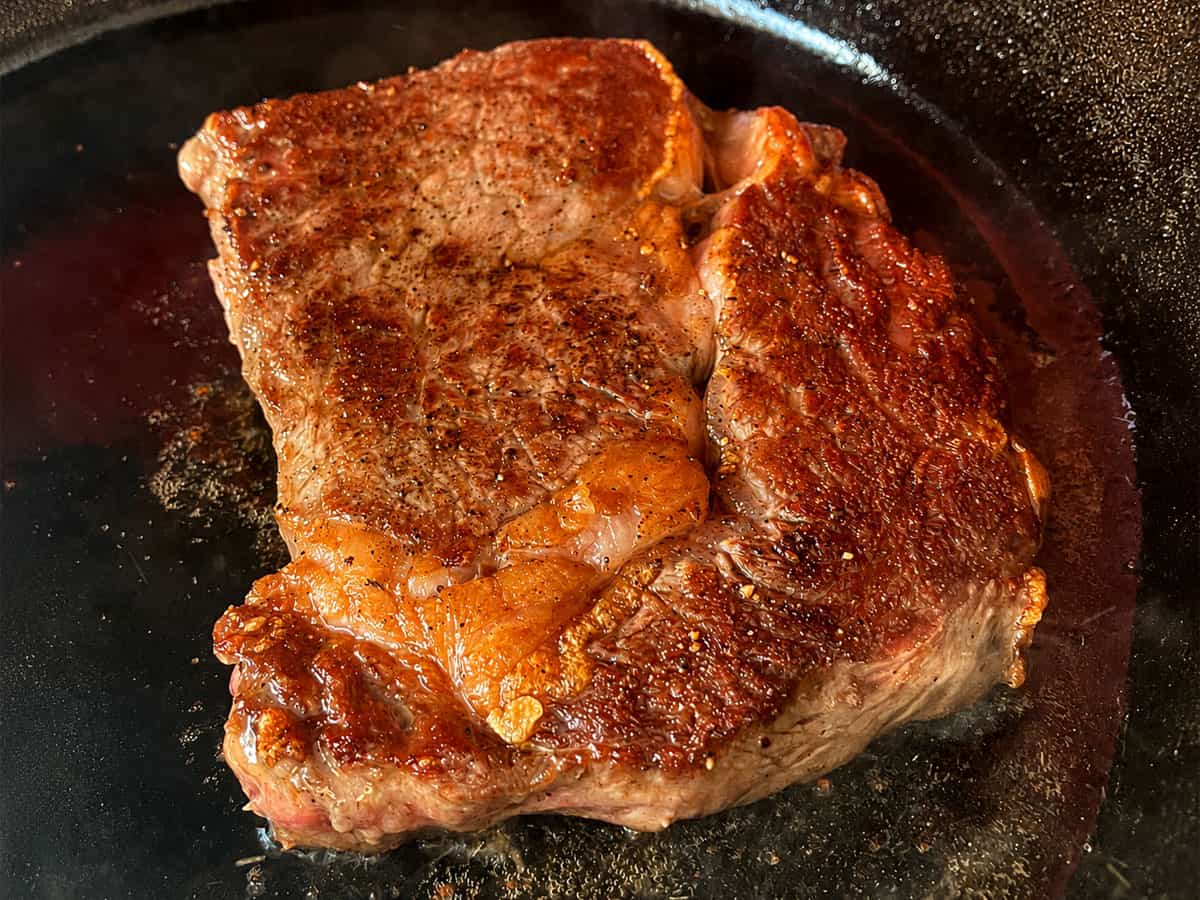
About This Method: Pan-searing means cooking the steak from start to finish in a heavy-bottomed skillet over high heat. The high heat quickly builds a deep, flavorful crust on the outside while bringing the center to your preferred doneness.
Pros: It’s fast, builds a great crust, works in any weather, and lets you easily turn the browned bits left in the pan into a quick pan sauce.
Cons: This method causes more carryover cooking than gentler cooking methods, so the steak keeps rising in temperature more after it comes out of the pan. That makes it easier to overshoot your target. It also creates a thicker gray band under the crust, produces a lot of smoke, and splatters oil all over the stove and counters.
Recommended Thickness: 0.5 to 1.5 inches / 1.3 to 3.8 cm
Cook Time: About 4-6 minutes for a 1-inch / 2.5 cm ribeye cooked to medium-rare
My Take: This is the method I use most often for ribeye steaks around 1 inch (2.5 cm) thick, especially well-marbled ones. All that intramuscular fat (marbling) keeps ribeye tender and juicy even if you overshoot your target a little, which makes it a very forgiving cut to pan-sear. That matters because the high heat and stronger carryover cooking make precise doneness harder to nail with this method. It takes a little practice to get pan-searing right, but once you do, the results are consistently excellent. Cleanup is the obvious downside, but for ribeyes this thick, pan-searing is still one of my favorite techniques.
2. Reverse Searing
(Best for: Thick steaks cooked evenly from edge to edge)
About This Method: Reverse searing means cooking the steak gently over low heat until it’s just below your preferred doneness, then finishing it over high heat to build a deep, flavorful crust. The most common setup is an oven followed by a hot skillet, but you can use the same method on a grill or smoker.
Pros: Easy to do, cooks the steak very evenly from edge to edge, almost no gray band, a good crust, and requires very little attention during the low-heat stage.
Cons: It takes longer overall than most other methods, and the steak can easily overshoot your target temperature if you leave it over high heat too long during the final sear.
Recommended Thickness: 1.5 to 2+ inches / 3.8 to 5+ cm
Cook Time: About 1 hour total for a 2-inch / 5 cm ribeye cooked to medium-rare
My Take: Reverse searing is a solid choice for ribeyes around 1.5 to 2 inches (3.8 to 5 cm) thick, especially well-marbled cuts. It’s fairly simple and delivers consistent results as long as you keep the final sear short. The main drawback is the time it takes, especially with steaks over 2 inches (5 cm) thick. At home, I usually go with a forward sear for thick steaks because it’s faster, or sous vide because most of the cooking is hands-off. I prefer reverse searing outdoors, where the extra time doesn’t bother me as much, and the grill or smoker adds a smoky flavor you simply can’t get from an oven and skillet indoors.
3. Forward Searing
(Best for: Cooking thick steaks in less time)
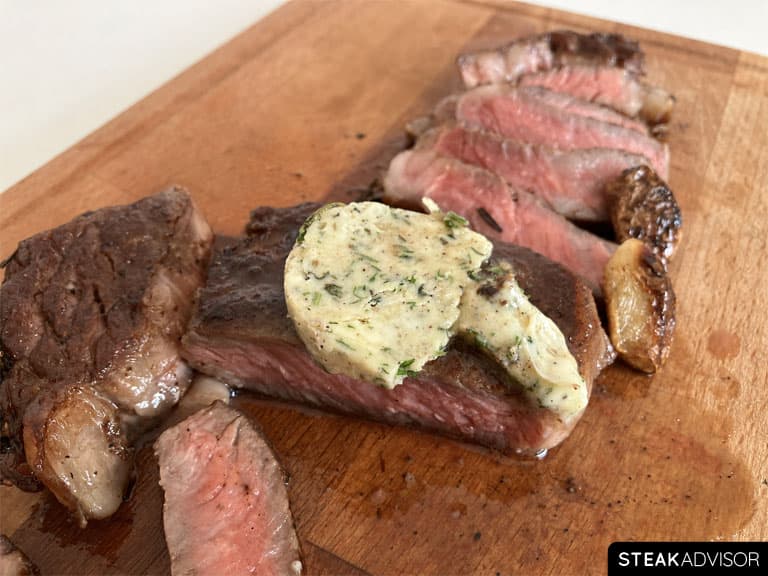
About This Method: Forward searing cooks the steak in two stages. The steak first sears over high heat to develop a deep, flavorful crust, then finishes more gently at a lower temperature until it reaches the target doneness. The classic setup uses a skillet and oven, but the same method works on a grill or smoker by starting over direct heat and finishing over indirect heat.
Pros: It’s simple, builds a deep crust, cooks the steak fairly evenly from edge to edge, and makes it easy to control the final internal temperature.
Cons: It leaves a slightly thicker gray band and is tricky on a grill because you can’t quickly drop the temperature to finish the steak low and slow.
Recommended Thickness: 1.5 to 2+ inches / 3.8 to 5+ cm
Cook Time: About 30 minutes for a 2-inch / 5 cm ribeye cooked to medium-rare
My Take: Forward searing is my go-to method for cooking ribeyes thicker than about 1.5 inches (3.8 cm) indoors. It’s seriously underrated. Done right, it gives you a deep crust, fairly even doneness, and only a slightly thicker gray band than a reverse sear. For me, it hits the sweet spot between pan-searing and reverse searing.
The key is to sear the steak hard for about 4 minutes, then finish it at around 225°F (110°C). Finishing at 300-400°F (150-205°C) cooks the outside too aggressively and gives you less control over the final doneness. Keep the finishing temperature low, and you will get a more evenly cooked steak in roughly half the time of a reverse sear.
4. Sous vide
(Best for: Cooking to the exact internal temperature every time)
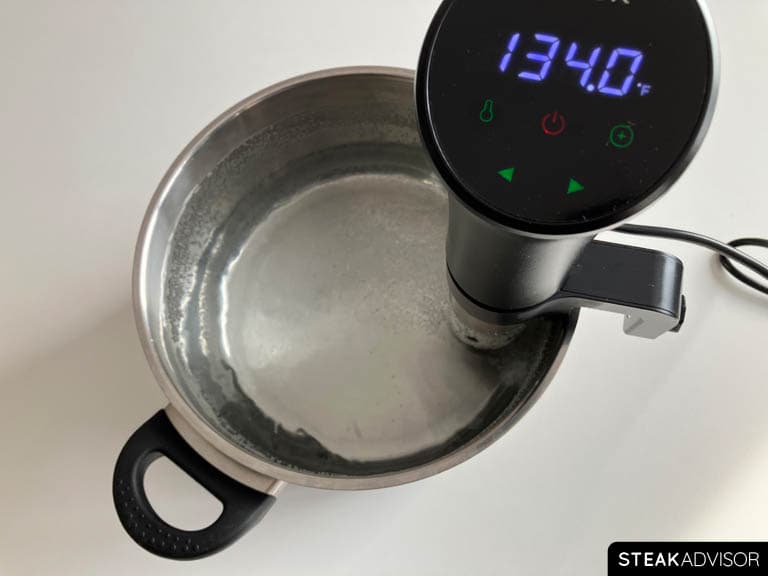
About This Method: Sous vide cooks the steak in a precisely controlled water bath. The steak is sealed in a bag and cooked at the exact temperature you want until it’s evenly done from edge to edge, then finished with a quick sear over high heat to build a good crust.
Pros: It’s the most foolproof method, cooks the steak evenly from edge to edge, takes the guesswork out of internal temperature, and is completely hands-off until the final sear.
Cons: It requires special equipment, takes several hours from start to finish, and the final sear can still push the steak past the target temperature if it goes too long.
Recommended Thickness: 1.5 to 2+ inches / 3.8 to 5+ cm
Cook Time: About 4 hours total for a 2-inch / 5 cm ribeye cooked to medium-rare
My Take: Sous vide is my go-to when I want perfectly even doneness from edge to edge, especially for a nice, well-marbled ribeye. What I like most about it is the flexibility. I can put a few steaks in the water bath, work on the sides, and then sear the steaks right before serving. The method itself is extremely easy. The only part you really need to watch is the final sear. Let the steaks cool slightly first and keep the sear short, or you’ll overshoot your target doneness.
5. Direct grilling
(Best for: Smoky flavor and cooking outdoors)

About This Method: Direct grilling is basically the outdoor version of pan-searing. The steak cooks quickly over high heat, directly on hot grill grates over charcoal, gas, or pellets. The goal is to get a deeply browned, lightly charred crust on the outside while bringing the center to your target doneness.
Pros: It’s fast, gives the steak a great smoky flavor, builds a nice charred crust, keeps the smoke and mess outside, and makes cooking feel like more of an outdoor experience.
Cons: Flare-ups are common, heat is harder to control precisely, the steak develops a thicker gray band under the crust, and you’re stuck dealing with whatever weather you get.
Recommended Thickness: 0.5 to 1.5 inches / 1.3 to 3.8 cm
Cook Time: About 6-8 minutes for a 1-inch / 2.5 cm ribeye cooked to medium-rare
My Take: Direct grilling is a great way to cook a steak fast, but ribeye is harder to grill over direct heat because of all the marbling. As the fat renders and drips onto the heat source, it causes flare-ups. That’s why direct grilling is best for thinner ribeyes, around 1 inch (2.5 cm) or less, unless you’re comfortable managing the heat and dealing with flare-ups throughout the cook. It takes constant attention and is harder for beginners, but once you get the hang of it, it’s one of the fastest and most satisfying ways to cook a ribeye.
6. Oven broiling
(Best for: Fast cooking using only the oven)
About This Method: Oven broiling cooks the steak from start to finish under the oven’s top heating element, using intense direct heat from above. It’s a quick, simple method that skips the stovetop and grill entirely.
Pros: It’s fast and doesn’t require a separate sear in a skillet or on the grill.
Cons: Broilers have hot spots, so steaks cook unevenly. The intense heat also means more carryover cooking, making it easy to overshoot your target doneness. You also get a thicker gray band under the crust, along with plenty of flare-ups and smoke. And because broilers vary so much from oven to oven, the results are less consistent.
Recommended Thickness: 1 to 2 inches / 2.5 to 5 cm
Cook Time: About 8 to 12 minutes, depending on thickness and target doneness
My Take: I included broiling mainly because some people only have an oven and broiler to work with. That said, I don’t recommend it if you care about even doneness and good control over the cooking process. It’s also a bad fit for a heavily marbled ribeye, since all that rendered fat can cause serious flare-ups. If you do cook a ribeye this way, keep a close eye on it from start to finish and position it farther from the broiler than you would a leaner steak. If you like your steak cooked past medium and don’t care that much about getting a great crust, though, broiling does the job.
