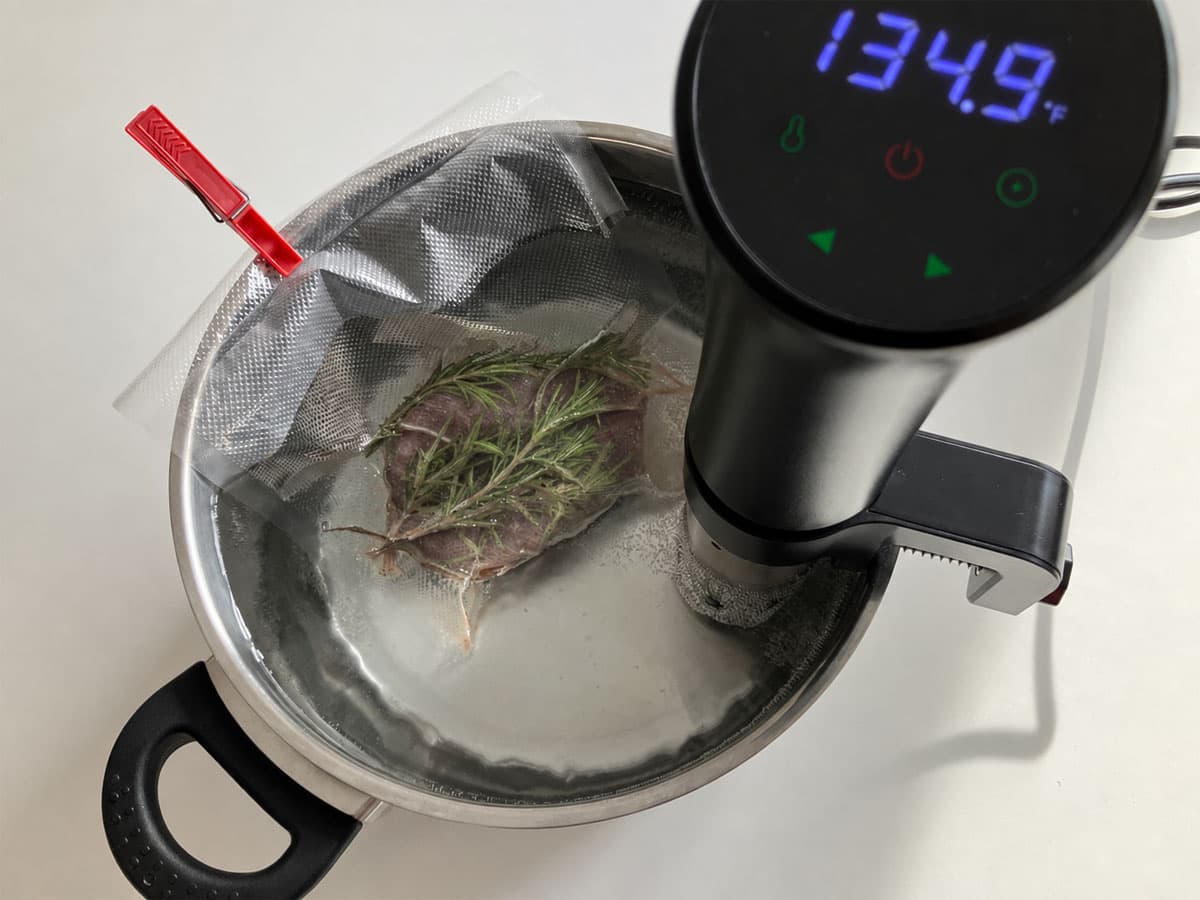

This is my go-to sous vide steak recipe. The steak turns out tender and juicy, with even doneness from edge to edge, a nicely browned crust, and a rich garlic-herb butter flavor.
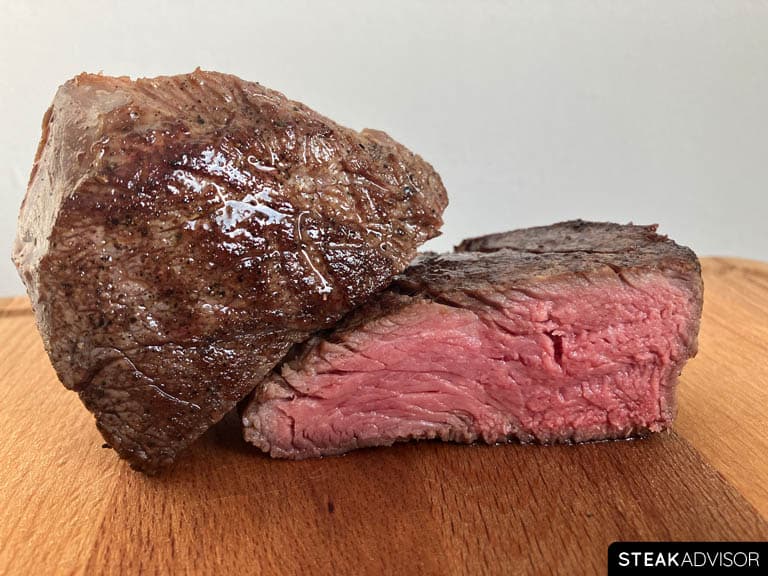
Sous vide is the method I choose when I want an expensive, well-marbled cut like a USDA Prime or Wagyu ribeye cooked perfectly. I set the target temperature, for example 137°F (58°C), and the steak cooks evenly to exactly that doneness, no more and no less.
It’s also a great method for beginners because it’s much more forgiving than cooking a steak entirely over high heat. The only tricky part is the final sear. It needs to be hot and fast so you get a good crust without overcooking the steak.
Note
The full step-by-step recipe is just below. For extra tips and common mistakes to avoid, check out the FAQ.
Ingredients You’ll Need
For steak in a bag:
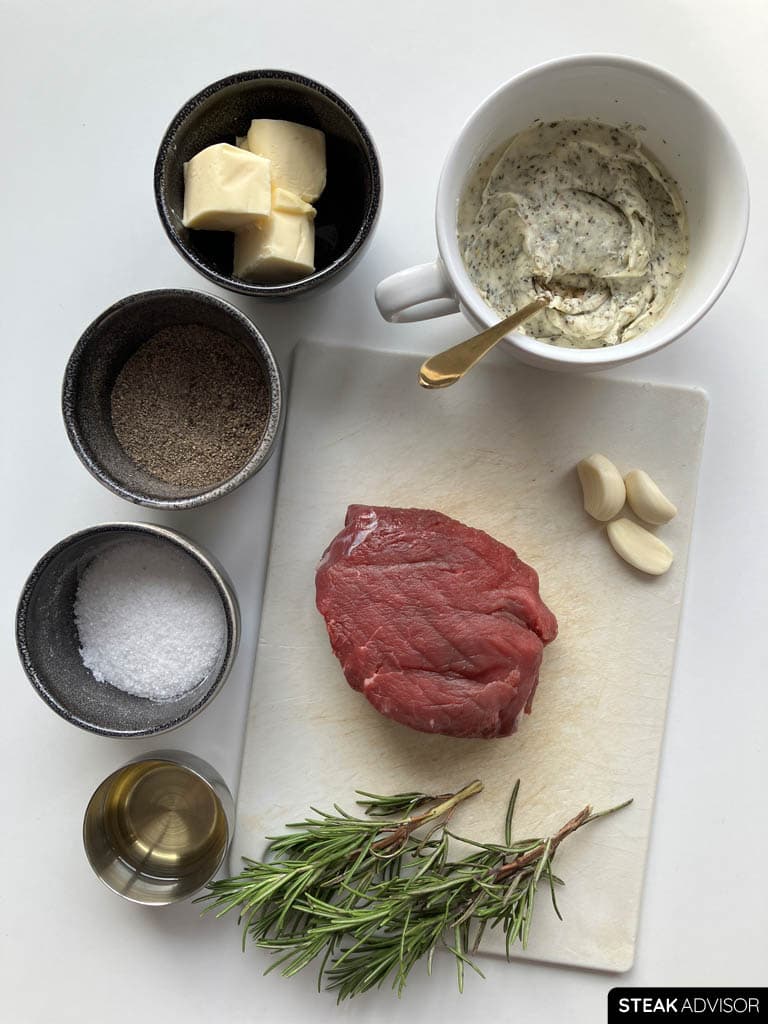
- Steak: Technically, you can cook pretty much any steak using sous vide, no matter the thickness. But realistically, 1 to 2 inches (2.5-5 cm) thick, naturally tender cuts like filet mignon, ribeye, or strip steak work best. They don’t take forever to cook, and the results are consistently great. That said, sous vide is also great for tougher cuts (I explain that more in the FAQs).
- Salt: About 1% of the steak’s weight – 0.12 ounce (3.4 grams) for a 12-ounce (340-gram) steak; roughly 1 1/4 teaspoons Diamond Crystal kosher salt, 3/4 teaspoon Morton kosher salt, or 1/2 teaspoon table salt. I prefer kosher salt because its larger crystals are easier to distribute evenly over the steak. Weigh the salt the first few times; once you get a feel for the right amount, you can season by eye.
- Finely ground black pepper (optional): A generous pinch, for a bolder pepper flavor.
- Garlic powder (optional): A generous pinch, for a subtle garlic flavor.
- Fresh herbs (optional): A few sprigs of thyme or rosemary.
For the final sear in a pan:
- Oil or fat: About 2 tablespoons (30 ml) of a high-smoke-point oil or fat. Refined avocado oil is my go-to, but refined safflower oil, refined canola oil, refined olive oil, refined peanut oil, and clarified butter (ghee) all work well. Don’t use regular butter because it burns quickly over high heat.
For the garlic-herb compound butter:
Makes enough for 2 large steaks.
- Butter: Use 4 tablespoons (1/2 stick; 56 g) of good-quality unsalted butter with at least 80% butterfat. Use real butter, not margarine.
- Rosemary: Use 1/2 tablespoon finely chopped fresh rosemary or 1/2 teaspoon dried rosemary. Chop fresh rosemary very finely so it blends evenly into the butter without leaving any tough, woody pieces.
- Parsley: Use 1/2 tablespoon finely chopped fresh parsley or 1/2 teaspoon dried parsley.
- Garlic: Use 2 fresh garlic cloves, finely minced or pressed.
- Salt and black pepper: Start with a generous pinch of each (about 1/8 teaspoon), then taste and adjust as needed.
Here are a few more recipes for compound butter if you’d like to try a different flavor.
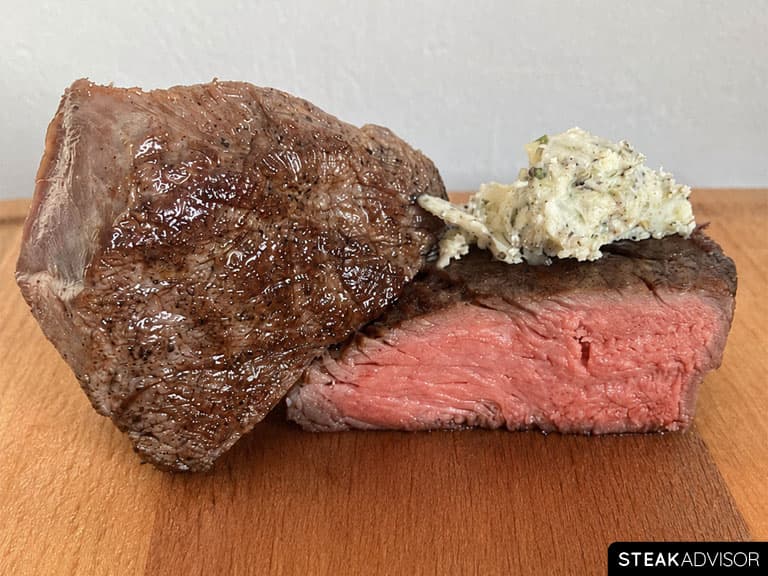
As soon as I finish searing the steak, I place a pat of compound butter on top while it’s still hot and let it melt over the surface. It’s the easiest way to add tons of garlic-herb butter flavor without risking overcooking the steak.
Tools You’ll Need
- Sous vide machine (immersion circulator): You don’t need anything fancy. A basic model will do the job. It circulates the water and keeps it at a precise temperature while the steak cooks. Reliable models typically cost around $50 to $100, so there’s no need to spend extra on a high-end one.
- Heat-safe container or pot: Use a container deep enough to fully submerge the steak and fit the circulator. A large pot works well for shorter cooks. For longer cooks of 12 hours or more, use a plastic container with a lid to reduce water evaporation.
- BPA-free bags suitable for sous vide: Use bags specifically made or approved for sous vide cooking. Vacuum-seal bags, Stasher bags, and Ziploc freezer bags all work well. Don’t use regular plastic bags.
- Vacuum sealer (optional): You’ll need one if you’re using vacuum-seal bags. If you cook sous vide regularly, it’s a worthwhile and affordable investment. You can also use it to store food in the refrigerator or freezer.
- Skillet, grill, or culinary torch: Any of these will work for the final sear. I usually use a cast-iron skillet, but go with whichever method you prefer. The goal is to build a good crust quickly, ideally in 1 to 2 minutes.
- Meat thermometer (optional): If you’re new to cooking steak, a thermometer can help confirm that you’ve reached your target doneness. With sous vide, though, it isn’t really necessary. Once you slice into the steak, you can clearly see how it’s cooked, especially if you’re familiar with what different levels of doneness look like.
How to Sous Vide a Steak
Step 1: Choose the Temperature
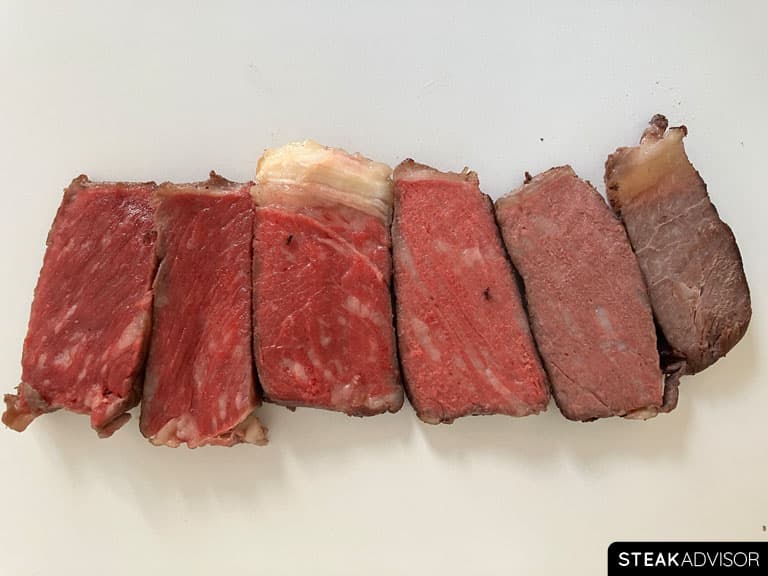
Start by choosing how you want your steak cooked. With sous vide, the water-bath temperature determines the steak’s final doneness. For example, if you want a medium-rare steak at 137°F (58°C), simply set the water bath to that temperature.
| Desired doneness | Temperature Range |
| Very Rare to Rare | 118°F (48°C) to 128°F (53°C) |
| Medium-Rare | 129°F (54°C) to 139°F (59°C) |
| Medium | 140°F (60°C) to 149°F (65°C) |
| Medium-Well | 150°F (66°C) to 155°F (68°C) |
| Well-Done | 156°F (69°C) and above |
For well-marbled cuts like ribeye and New York strip, I recommend 135–137°F (57–58°C). The higher temperature helps render the intramuscular fat, giving the steak a richer flavor and better texture. With leaner cuts like filet mignon, many people prefer 129–131°F (54–55°C) for a more tender, juicy result.
Step 2: Determine the Cooking Time
For a refrigerated, naturally tender steak, such as ribeye, New York strip, or filet mignon, the minimum time needed to heat the center depends mainly on the steak’s thickness. Use the times below as a quick reference.
| Steak Thickness | Minimum Cook Time* |
| 1 inch (2.5 cm) | 1 hr 15 min |
| 1 1/2 inches (3.8 cm) | 2 hr 20 min |
| 2 inches (5 cm) | 3 hr 35 min |
For frozen steaks, other thicknesses, tougher cuts, or pasteurization times, use the calculator for a more precise recommendation.
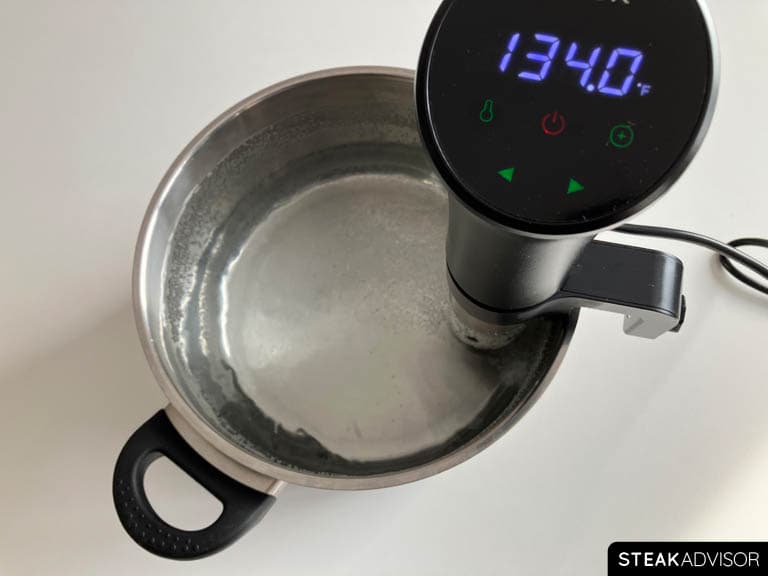
Step 3: Preheat the Sous Vide Water Bath
Once you know your steak’s target temperature and cooking time, fill the container with water, keeping the level between the circulator’s minimum and maximum fill lines. Set the circulator to the target temperature and let the water bath preheat before adding the steak.
While the water bath preheats, move on to Step 4: Season the Steak.
Step 4: Season the Steak
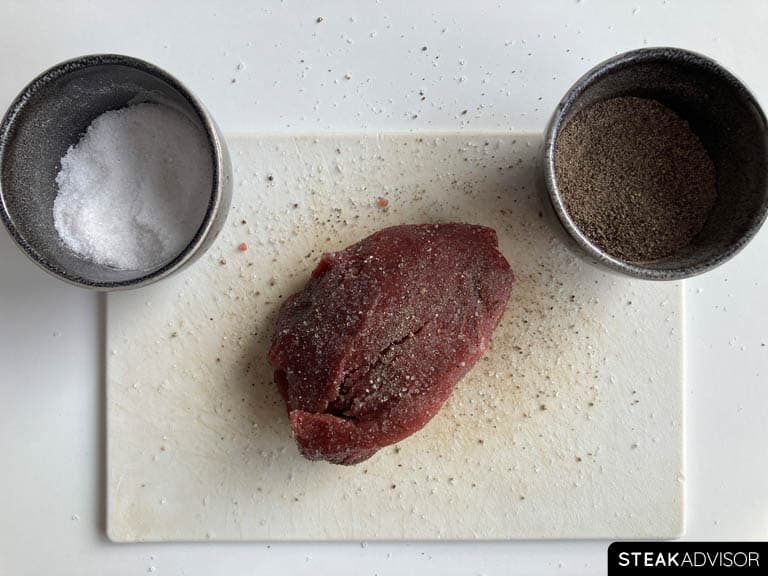
Pat the steak dry with paper towels. Season it all over, including the edges, with salt equal to about 1% of the steak’s weight.
For a 12-ounce (340-gram) steak, that works out to 0.12 ounces (3.4 grams) of salt, or approximately:
- 1 1/4 teaspoons Diamond Crystal kosher salt,
- 3/4 teaspoon Morton kosher salt,
- or 1/2 teaspoon table salt.
If using black pepper and garlic powder, season the steak with them now. Use a generous pinch on each side, or season to taste.
Step 5: Bag and Seal the Steak
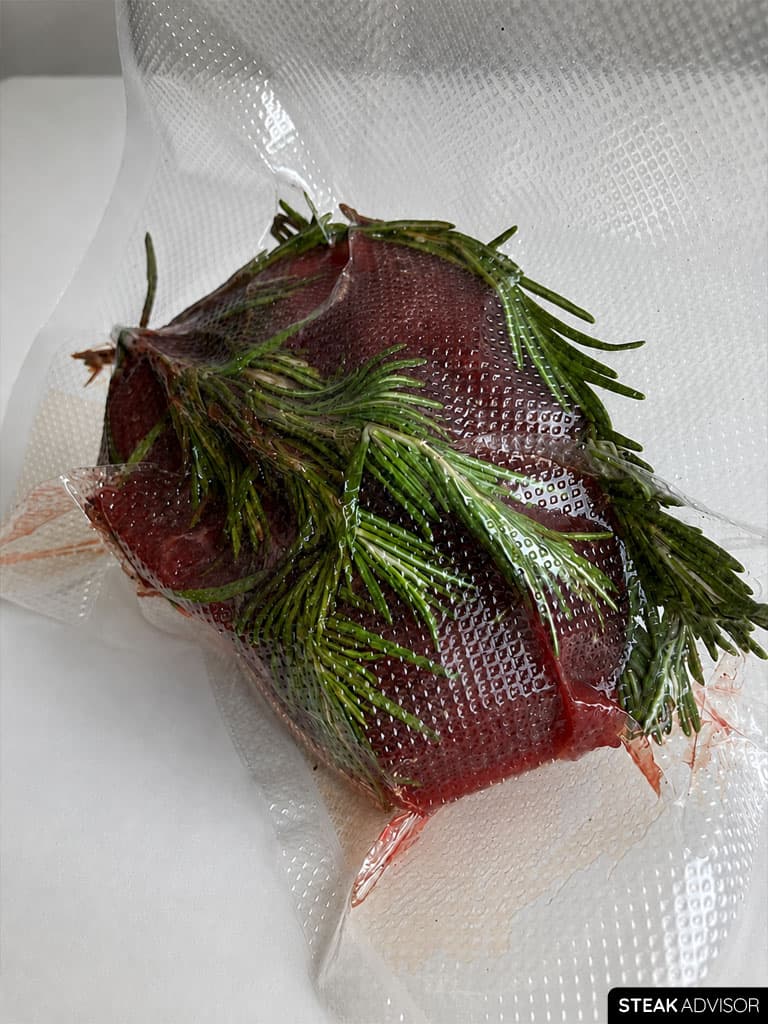
Place the seasoned steak in the bag.
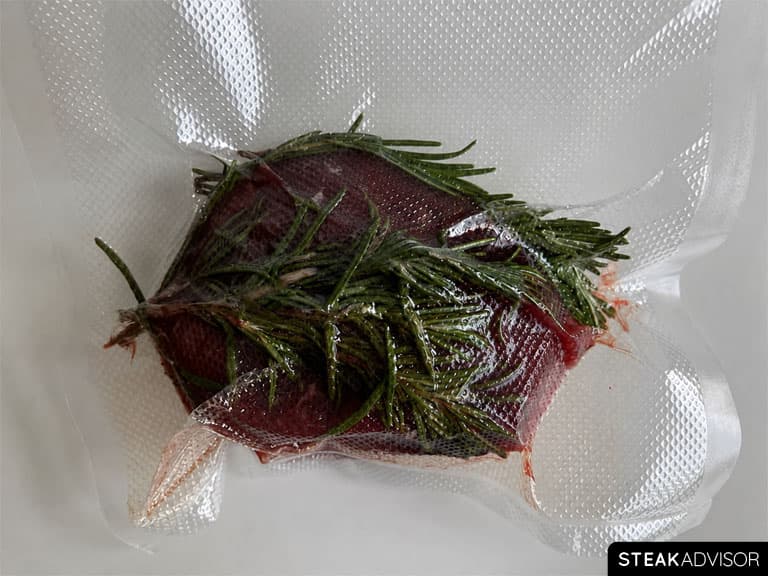
If desired, put a few sprigs of rosemary, thyme, or other fresh herbs on both sides of the steak, then seal the bag with a vacuum sealer.
If using a zipper bag, use the water displacement method instead. Slowly lower the bag into a pot of water, keeping the opening above the surface. The water pressure will force most of the air out. Seal the bag just above the waterline. Remove as much air as possible so the steak stays fully submerged during cooking.
Step 6: Cook the Steak Sous Vide
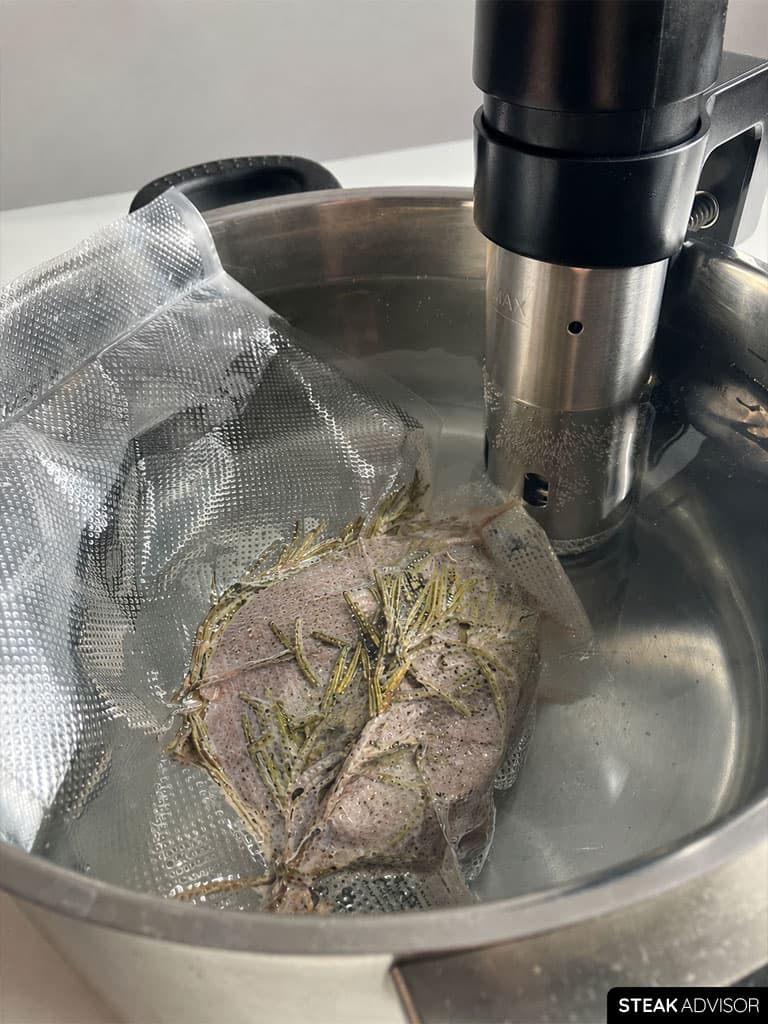
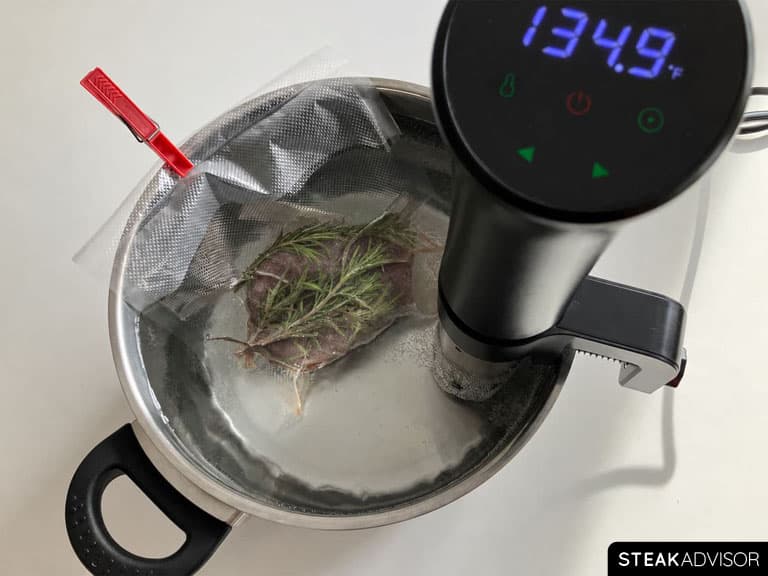
Once the water bath has reached the target temperature, place the sealed bag in the water. Make sure it doesn’t block the circulator’s intake or outlet, since the water needs to flow freely for even cooking. The bag should stay fully submerged; if it floats, weigh it down or clip it to the side of the container.
Cook the steak for the time recommended by my sous vide steak calculator. If you selected pasteurization, follow the longer cooking time shown by the calculator.
Note
For food safety, steaks cooked sous vide at temperatures below 130°F (54°C) should not be left in the water bath for longer than 2 hours.
Step 7: Make the Garlic-Herb Compound Butter
Cut the butter into small pieces and place it in a bowl. Let it soften at room temperature until it’s easy to mix but not melted. To speed things up, microwave it in a microwave-safe bowl in 5-second intervals, checking after each interval.
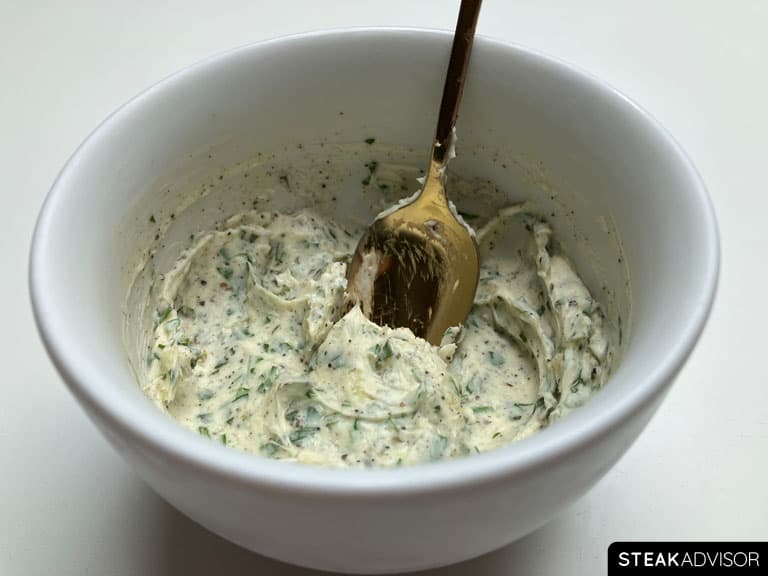
Add the rosemary, parsley, garlic, salt, and black pepper. Mix well with a fork until evenly combined, then taste and adjust the seasoning as needed.
Cover and refrigerate until ready to use.
Step 8: Remove Steak From Bag
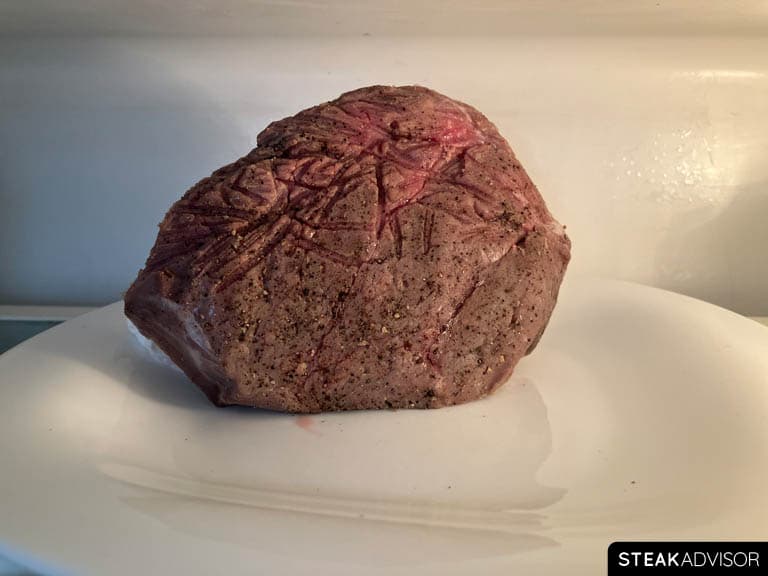
Once the steak has cooked for the time you planned, remove it from the bag and pat it completely dry on all sides with paper towels. Place it uncovered on a wire rack set over a sheet pan and refrigerate for 15-20 minutes before the final sear. No wire rack? Stand the steak upright on one edge on a plate.
This short chill slightly lowers the steak’s temperature and helps dry the surface, giving you more time to build a deep crust without pushing it past your target doneness.
Note
For steaks about 2 inches / 5 cm thick or more, refrigerate for an additional 5-10 minutes. For steaks around 1 inch / 2.5 cm thick (or when using a very fast open-flame sear) you can shorten the chilling time slightly.
Step 9: Sear the Steak
About 15 minutes before searing the steak, take the compound butter out of the refrigerator and let it soften slightly at room temperature.
Tip: Turn on the exhaust fan and crack a window before you begin. A very hot pan creates plenty of smoke and can easily set off the smoke alarm.
Heat a skillet over medium-high heat for 3-4 minutes. Add 2 tablespoons of high-smoke-point oil and let it heat for another minute. The pan should be very hot.
While the pan heats, pat the steak dry again with paper towels. Even if it looks dry, do it again. The drier the surface, the better the crust.
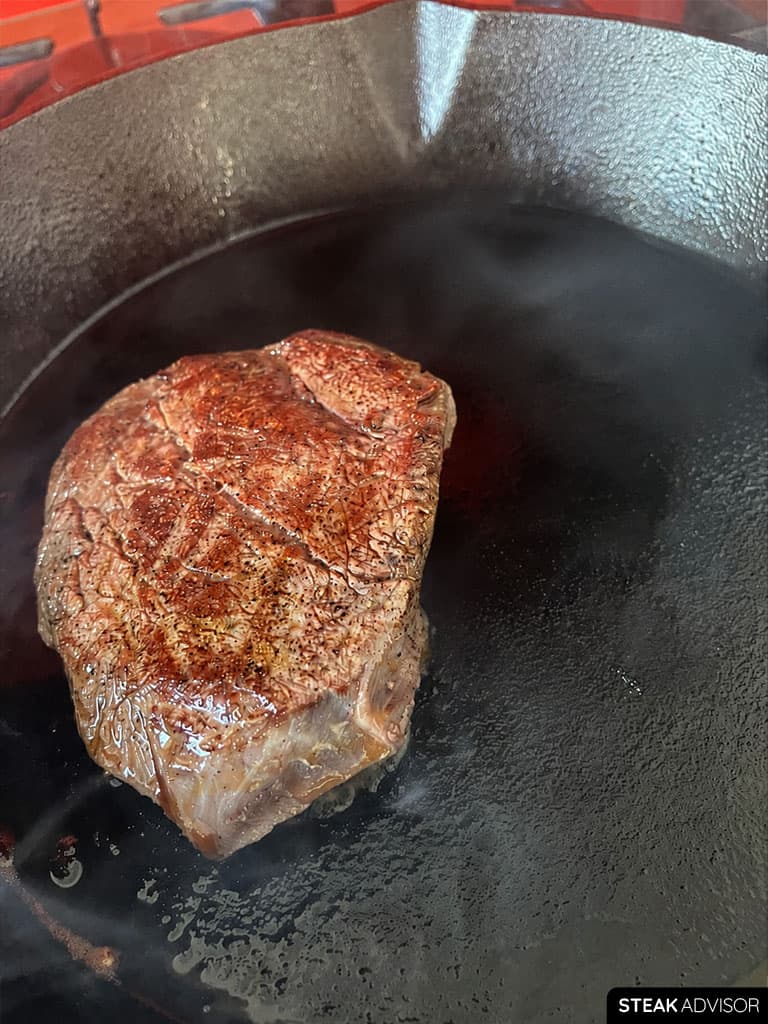
Place the steak in the pan and sear for 2 minutes total, flipping every 30 seconds.
Optional: If the steak has a fat cap, as with a strip steak or picanha, hold it fat-side down for 60-90 seconds, or until nicely browned. If it doesn’t have a fat cap, quickly sear the remaining edges for about 15 seconds.
Note
If you’re using a grill or torch instead of a pan, keep the sear short. The goal is to build a crust, not cook the inside any further.
Treat the 2-minute sear as a starting point. A longer rest in the refrigerator may give you a little more time, but the ideal searing time depends on the steak’s thickness, target doneness, and the intensity of your heat. Adjust carefully based on your setup, and test longer searing times on a less expensive steak first.
Step 10: Serve the Steak
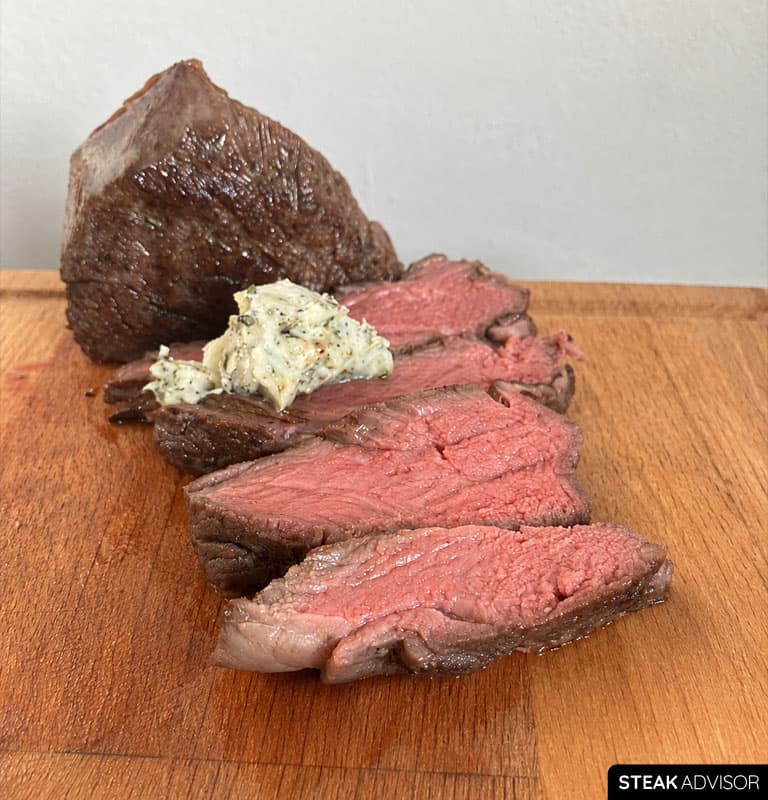
As soon as the steak comes out of the pan, top it with a pat of compound butter and let it melt over the hot crust. Serve immediately with your favorite sides.
There’s no need to rest a sous vide steak after the final sear.
Note
Unlike a steak cooked entirely in a pan or on the grill, a sous vide steak cools quickly after the final sear. Have your sides ready before you start the final sear, then sear, plate, and serve immediately.
What to Serve with Sous Vide Steak
One of the biggest advantages of sous vide is the flexibility it gives you. Once the steak has reached the minimum cooking time recommended by the sous vide calculator, you can leave it in the water bath a little longer without affecting its doneness – the steak will stay at the target temperature.
Just don’t leave naturally tender cuts, especially filet mignon, in the bath for several extra hours, or the texture may begin to soften too much.
This makes timing the rest of the meal much easier. Figure out how long your side dishes will take, then remove the steak from the bag about 30 minutes before you’re ready to serve. Dry it, chill it briefly in the refrigerator, and finish it with a quick sear.
That flexibility gives you plenty of time to make something special – or keep things simple with an easy, flavorful side. Here are a few of my favorites to serve with sous vide steak:
- Crispy roasted potatoes
- French fries
- Thick-cut steak fries
- Creamy mashed potatoes
- Roasted asparagus
- Sautéed mushrooms
- Creamed spinach
- Caesar salad
- Roasted Brussels sprouts
Sous Vide Steak FAQs
Sous vide steak: what is it?
“Sous vide” literally means “under vacuum” in French. It’s simply a way of cooking steak in water at a precise, controlled temperature for a set amount of time. It’s basically a two-step process. First, you seal the steak in a bag and cook it in a water bath set to your target temperature using a sous vide machine. Once the inside is exactly where you want it, you finish it with a quick, hard sear to build crust.
Here’s the key point: the temperature you set on the sous vide bath determines the final doneness of your steak. That’s it. If you cook it at 137°F (58°C), it will be 137°F (58°C) inside from edge to edge. You can’t overcook it during the sous vide phase in terms of temperature. Once the water reaches the set temperature and the steak reaches that internal temperature, it stays there. It won’t keep climbing, no matter how long it sits in the bath. The only thing that changes over time is texture.
The longer the steak stays in the bath, the more tender it gets. That can be great. But push it too far, and it starts getting too tender, even a bit mushy. And that’s usually not what you want. That’s why sous vide isn’t just about temperature. Cooking time matters too. A tender cut like filet mignon only needs a few hours. A tough cut like round steak? That can go 48–72 hours if you want it really tender.
The final sear is the easiest part to get wrong. If you take it straight out of the bag and throw it into a ripping-hot pan without cooling it down first, you’ll overshoot your target. That’s where most people go wrong. Hopefully, it’s easy to avoid. I’ll show you exactly how. But first, let’s go through the biggest advantages (and a few downsides) of cooking steak sous vide.
What are the advantages of cooking steak sous vide?
- Even cooking: Sous vide guarantees you true edge-to-edge doneness. The steak is exactly the temperature you set, from the center to the outer layer. No thick gray band. No overcooked outside and undercooked middle. Unless you mess up the final sear, it’s evenly cooked throughout.
- Consistency: You can’t overcook the steak during the sous vide stage. If you set it to 135°F (57°C), it will be 135°F (57°C). The only thing that changes over time is texture. Leave it too long, and it can turn overly tender, but the internal temperature stays exactly where you set it.
- Simple and forgiving: Set the temp, put the steak in the bath, and walk away. No babysitting. No constant flipping. No stress. These days, it’s easy to find the exact time and temperature for any cut, so even if you’re not into gadgets, it’s very beginner-friendly.
- Minimal prep: Season the steak, seal it in a bag, cook it, then sear it at the end. That’s it. Nothing complicated.
- Less mess: The steak cooks in a bag, so there’s almost no cleanup until the final sear. And if you finish it with a torch instead of a pan, it’s even cleaner. No oil splatter everywhere. You can also take it outside and sear it over a hot grill if you want to keep the smoke out of your kitchen.
- Great for cooking for a crowd: This is one of the biggest advantages. You can cook several steaks (even dozens) at once without stressing, as long as they’re not stacked in the bag so that the water can circulate properly. They’ll all cook evenly. Then, at the end, give each one a quick, hard sear to build a crust (about 1-2 minutes per steak). Simple and efficient.
- Wide serving window: Once the steak reaches your target temperature, you don’t have to rush. It can stay in the bath for quite a while. That gives you time to focus on the sides. When you’re ready, dry it, sear it, and serve. No panic. Perfect for parties or larger dinners.
- No resting needed: After the final sear, slice the steak and serve it immediately. In fact, it’s better to eat it right away because sous vide steak cools faster than traditionally cooked steak.
- Keeps more moisture: Since the steak cooks at a lower temperature inside a sealed bag, it loses less moisture than with high, direct-heat cooking methods.
- Versatility: You can season it however you want before sealing the bag. Simple salt and pepper, herbs and butter, dry rubs, even marinades. The flavor develops while it cooks. You have more room to experiment compared to traditional high-heat methods.
- Safer if you care about that: You can pasteurize steak by holding it at a specific temperature for a long enough time. That makes it safer, especially for people who worry about medium-rare steak.
- Great for tough cuts: With sous vide, you can turn tougher, cheaper cuts into something surprisingly tender. Longer cooking times break down connective tissue without overcooking the meat. For example, round steak can cook for 48-72 hours and come out tender.
What are the disadvantages of cooking steak sous vide?
- Long cooking time: Sous vide takes time. A thick 2 1/2-inch (6.3 cm) filet mignon cooked with a traditional forward sear takes about 30 minutes total. With sous vide, that same steak takes about 4 hours to fully reach your target internal temperature, and about 30 minutes more if you want it fully pasteurized.
- Special equipment required: You need a sous vide machine, a container for the water, and, if you’re cooking for a long time, something to cover it so the water doesn’t evaporate. You also need proper bags.
- It’s boring: If you actually enjoy cooking steak the traditional way (controlling the heat, flipping, building the crust), sous vide feels boring. You seal it, drop it in water, wait… and then sear. That’s basically it.
- Easy to mess up the final sear: Ironically, the only technical part comes at the very end. If you take the steak straight from the bag and throw it into a ripping-hot pan without cooling it down first, or if you sear it too long, you can overshoot your target temperature and ruin that perfect edge-to-edge doneness.
What are the best cuts of steak for sous vide?
Sous vide is one of those steak-cooking methods that works well with almost any cut of steak, regardless of its fat content or natural tenderness. What matters more is the kind of result you want and how tender you want the steak.
The best steaks for sous vide are naturally tender cuts about 1 to 2 inches (2.5-5 cm) thick, such as ribeye, strip steak, filet mignon, porterhouse, T-bone, picanha, flat iron steak, denver steak, tomahawk steak, and cowboy steak. These cuts cook relatively quickly. But sous vide also works very well for tougher cuts like chuck steak, round steak, or sirloin. These cuts have more connective tissue, and cooking them for a very long time (even 1 to 3 days at a precise temperature) makes them much more tender.
That’s why sous vide is one of the most versatile steak-cooking techniques. It works great for naturally tender cuts, but it also does a great job with tougher ones. What’s really amazing is that there’s basically no other cooking method this easy that can turn a really tough cut into a tender one without using marinades or other tenderizing techniques. It opens up many possibilities. You can take relatively cheap and naturally tough cuts and turn them into something surprisingly tender.
If you’re not familiar with the differences between steaks, take a look at my guide to the different types of steak.
How thick should a steak be for sous vide?
In most cases, the best thickness for a steak cooked sous vide is 1 1/2 to 2 inches (3.8-5 cm), with 1 inch (2.5 cm) as the absolute minimum. This range works best for most people because the steak doesn’t take too long to cook. Depending on the cut and whether you plan to pasteurize it, steaks in this range usually take about 1 to 4 hours to reach a target temperature of 135°F (57°C).
Very thick steaks take much longer to cook. In many cases, it’s simply better to use the reverse sear, or even better, the forward sear cooking method, which can cook a 2 1/2-inch (6.3 cm) steak much faster than sous vide. On the other hand, you can cook naturally tender steaks thinner than 1 inch (2.5 cm) with sous vide, but building a decent crust during the final sear becomes more difficult (sometimes even impossible) without overcooking the inside.
For very thin steaks, cooking them directly over high heat in a pan or on a grill usually works better and only takes a few minutes. The exception is tougher cuts, which benefit from longer cooking times that break down connective tissue, making the meat more tender.
Which containers work best for sous vide?
The best container for sous vide depends on how often you cook, how long you cook, and how much food you make. Ideally, the best option is a polycarbonate tub designed specifically for sous vide machines, as it’s the most convenient setup. But not everyone wants to spend extra money on a dedicated container. If that’s the case, you can use a stockpot or even an insulated cooler if you already have one at home.
The key is to choose a container that fits your needs. Each option has its own advantages, so below I’ll briefly explain when each one works best.
1. Polycarbonate Food Containers (Best overall)
These are the most commonly recommended containers for immersion circulators and are ideal if you cook sous vide regularly. I especially recommend them if you often cook several steaks at once.
Pros
- Food-safe polycarbonate withstands sous vide temperatures well
- Transparent so you can see the food
- Available in practical sizes.
- Compatible with lids that reduce evaporation
- Durable and commonly used in professional kitchens.
Cons
- You need to buy a lid or cut a hole for the circulator
2. Large Stockpot or Dutch Oven (Best if you already own one)
If you don’t cook sous vide often or usually cook only 1-2 steaks, a stockpot or dutch oven works perfectly fine. Almost everyone already has one, so it’s a good option if you don’t want to spend extra money on equipment you’ll only use occasionally.
Pros
- No extra equipment needed
- Durable stainless steel
- Works well for small batches
Cons
- More heat loss than plastic containers
- More evaporation during long cooks
3. Insulated Coolers (Best for long cooks)
An insulated cooler has thick walls that significantly reduce heat loss. That’s why it’s a great option for long sous vide cooks. For example, when cooking tough cuts like chuck steak or round steak, which can take 24-72 hours.
Pros
- Excellent temperature stability
- Less evaporation
- Lower electricity use during long cooks
Cons
- Bulkier
- You need to cut a hole for the circulator
- You can’t see the food while it cooks
So let me summarize it quickly:
- Most people: polycarbonate container with lid
- Budget/starter: Stock pot you already own
- Long cooks: Insulated cooler
If you want to step things up, consider using a wire rack and a lid with a hole for the circulator. The wire rack sits inside the container and holds the bags in place. It keeps them from floating even if there’s some air left in the bag. Because of that, you don’t always need a perfect vacuum seal. You can also use reusable silicone bags, since the rack helps keep them submerged. The lid helps keep the circulator stable and reduces evaporation during long cooks.
What are the doneness temperatures for sous vide steak?
Because sous vide lets you cook steak so precisely, the doneness ranges are slightly different from traditional methods like pan-searing or grilling. With sous vide, it’s not just about hitting “medium-rare” or “medium” range. It’s about choosing an exact temperature.
Here’s how doneness typically looks for sous vide steak:
- Very Rare to Rare: 118°F to 128°F (48°C to 53°C)
- Medium Rare: 129°F to 139°F (54°C to 59°C)
- Medium: 140°F to 149°F (60°C to 65°C)
- Medium Well: 150°F to 155°F (66°C to 68°C)
- Well Done: 156°F (69°C) and above
Keep in mind that these ranges can vary slightly. There isn’t a strict, universal standard for steak doneness, and different regions, restaurants, and chefs may define the levels slightly differently.
Important!
If you drop the temperature below 130°F (54.4°C), you’re entering the food safety danger zone where harmful pathogens may survive. Because of that, you shouldn’t cook the food at those temperatures for more than 2 hours. For wild game, it’s especially important to cook the steak at a high enough temperature to kill potential parasites or bacteria.
If you want to learn more about sous vide food safety, I recommend reading “Is Sous Vide Safe? Key Safety Guidelines” by Jason Logsdon, “Basic Sous Vide Food Safety” by the International Sous Vide Association, and “A Practical Guide to Sous Vide Cooking” by Dr. Douglas Baldwin.
At what temperature should I set the sous vide to cook steak?
Use my sous vide steak time calculator to figure out how long to cook your steak and at what temperature based on its thickness, target doneness, the specific cut, and whether you want it heated through or fully pasteurized. It removes the guesswork.
Under the calculator, you’ll also find a detailed breakdown explaining why the timing matters and how temperature and cook time affect different cuts when cooking sous vide. Once you understand that part, everything becomes much more predictable.
Why does cooking time matter when cooking steak sous vide?
For this article, I’ll keep it short and explain why cooking at the right temperature (and for the right amount of time) matters so much.
When cooking steak sous vide, there are three main goals:
- First, heat the steak to your target doneness. That’s the whole point of sous vide. You set the temperature, and the steak cooks evenly from edge to edge. No guessing, no gray band. For example, 137°F (58°C) for a well-marbled ribeye. That’s the beauty of sous vide.
- Second, make the steak safe to eat: Food safety comes down to time and temperature. Bringing the steak to your target temperature heats it through, but holding it there long enough pasteurizes it. You don’t have to pasteurize – heating it through is enough for many people. But personally, I prefer to pasteurize, especially when cooking medium-rare. The extra time doesn’t hurt the steak, and I’d rather know it’s much safer to eat.
- Third, tenderize it (if the cut needs it): Sous vide isn’t just about temperature. Time matters just as much. Longer cooking helps break down tough connective tissue, making certain cuts significantly more tender. How much it helps depends on the cut and how long you leave it in the bath. But here’s the thing: not every steak needs that. A naturally tender cut doesn’t benefit from sitting in the water too long. It all depends on what you’re cooking.
Here’s why this matters.
- You can’t accidentally overcook the inside of the steak: Once you set the water temperature, the steak won’t go above it. Set 130°F (54°C), and it stays 130°F. That’s one of the biggest advantages of sous vide.
- Time changes texture: Temperature controls doneness. Time controls texture. The longer a steak sits in the bath, the more muscle fibers and connective tissue break down.
- Tough cuts benefit from longer cooks. Extra time can make naturally tough cuts noticeably more tender.
- Tender cuts don’t need long cooking. They need enough time to heat through or to pasteurize, if that’s your goal. Cook them too long, and you risk turning that natural tenderness into a soft, mushy texture.
- Thickness changes everything. Thicker steaks need more time to heat through, and even more if you want it pasteurized.
- Guessing time is a mistake. If you don’t cook the steak long enough, the center won’t actually be at your target doneness.
How many steaks can I sous vide at a time?
You can sous vide as many steaks as your container can hold without overcrowding. The key is to keep the steaks in a single layer and leave enough space between them for water to circulate freely. Do not stack them or press them tightly together, as this can lead to uneven cooking.
For the best results, seal each steak in a separate bag and use a sous vide rack to keep the bags upright and evenly spaced. Make sure your container is large enough and your circulator can maintain the target temperature throughout the cooking process.
Can I sous vide steak from frozen?
Yes, you can, but you need to give the steak more time to cook through properly. Depending on the thickness, it usually takes about 1-2 hours longer. If you want to be sure, use the sous vide calculator. One important thing: don’t cook the steak in the bag it came in from the store. Those bags usually aren’t safe for sous vide. Always rebag the steak in a proper sous vide-safe bag.
When it comes to seasoning, I recommend one of these two options:
- Option 1: When you buy the steak, put it into a sous vide-safe bag, season it with your favorite seasonings, seal it, and freeze it. Then, when you’re ready to cook, take it straight from the freezer and start cooking.
- Option 2: If the steak is already frozen in its original store packaging, thaw it safely in the refrigerator until you can remove the packaging. Transfer the steak to a sous-vide-safe bag, season it, and proceed with the recipe.
Is it possible to overcook the steak in sous vide?
Not in the traditional sense. A steak cooked sous vide will never go above the temperature of the water bath, so technically it can’t overcook the way it would in a pan or on a grill. However, leaving a steak in the bath for too long can affect its texture. After many hours, the meat can start to soften too much and eventually turn a bit mushy. It takes quite a while for that to happen, but it’s still something to keep in mind. How long is too long depends mainly on the cut.
Naturally tender steaks shouldn’t stay in the bath much longer than the time suggested by the calculator. For example, if you’re cooking filet mignon and the calculator shows 3-4 hours to reach the target temperature and pasteurize it, don’t leave it in the bath for more than about 5-6 hours in total, or you’ll start to notice a significant change in texture.
Tougher cuts are a different story. Cuts like round or chuck steak contain much more connective tissue, which needs long cooking times to break down. These cuts require 24 to 72 hours in the sous vide bath to become significantly tender. As a result, they can stay in the water bath for much longer without negatively affecting the texture. Still, even with tougher cuts, the steak shouldn’t be left in the bath forever.
Do I need to let the steak rest at room temperature before cooking it sous vide?
No, you don’t need to let the steak sit at room temperature before cooking it sous vide. Just take it straight from the fridge, seal it, and put it in the water bath. You can even cook steak directly from frozen. The only difference is that frozen steaks take a bit longer to reach the target temperature, so you’ll need to add a bit of extra time to the cook.
Why should you cool and dry a sous vide steak before searing?
The part where most people mess up is the final sear step. You can’t just move straight to searing this steak because it will overcook inside.
When the steak comes out of the sous vide bath, it’s already at your exact target doneness. If you throw it straight into a ripping-hot pan, even for a minute, you’ll push it past that temperature and build a thicker, gray band under the crust. Cooling the steak first fixes that.
A short rest in the refrigerator lowers the steak’s surface temperature and slightly cools the center. That gives you more time to build a proper crust during the final sear without risking overcooking the inside.
Now let’s talk about moisture. Sous vide steak comes out of the bag wet. And moisture is the enemy of a good crust. Moisture has to evaporate before a crust can form. If the surface is wet, you’re just steaming the steak. That’s why drying it thoroughly matters. Letting it sit in the fridge helps even more. It dries the surface and cools it slightly again.
That’s why patting it dry really well matters. And the 15-20 minutes in the fridge helps even more. As it sits on its side in the fridge, the surface dries out further, and the internal temperature drops slightly again. The result? A cooler steak with a drier surface. That means you can sear harder and longer to build a real crust – without overcooking the inside or forming a thick gray band.
Remember this:
- Fridge rest = more control during the sear.
- Less risk of overcooking.
- Better crust.
That’s how you build a real crust on a sous vide steak without pushing it past your target doneness.
Can you use rubs or marinades on sous vide steak?
Absolutely.
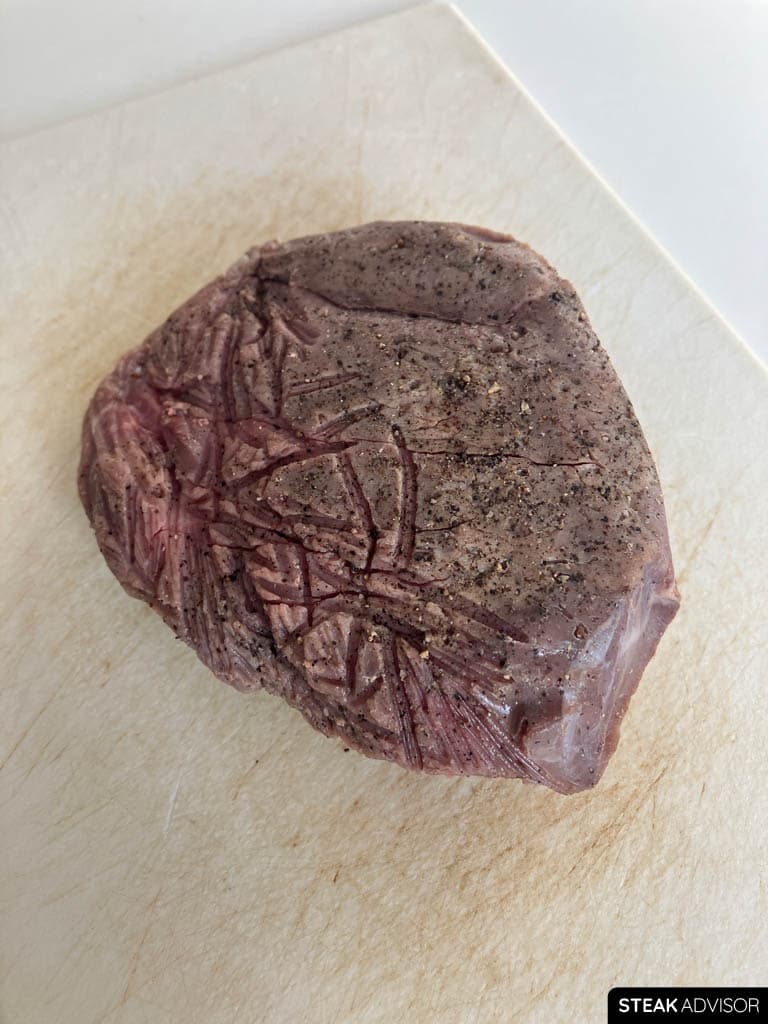
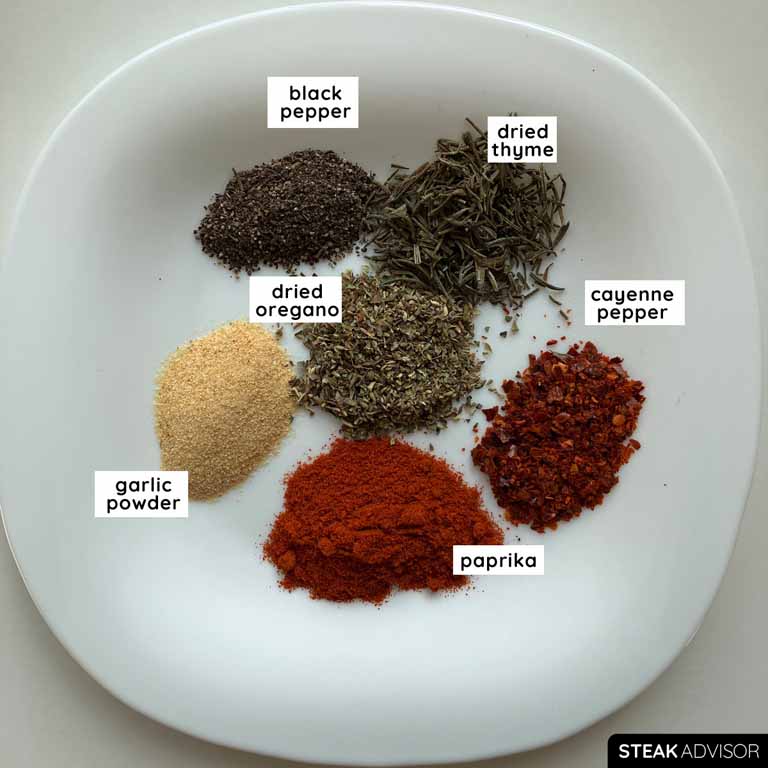
You can dry-brine the steak or season it with a spice rub, marinade, or a combination of them before cooking sous vide. Since the steak reaches its target doneness in the water bath, the final sear only needs to be brief. This makes it easier to use seasonings that might burn during a longer, traditional sear.
Before searing, remove any excess marinade and pat the steak very dry. Then sear it quickly over high heat, especially if the rub or marinade contains sugar, garlic, or other ingredients that can burn easily.
Can I Refrigerate the Steak After Sealing It in the Bag?
Yes. You can refrigerate the sealed steak for a few hours or even overnight before cooking it sous vide.
One thing to keep in mind: if the steak is heavily salted, leaving it sealed for 12 hours or longer (especially 16-24 hours) may give it a slightly cured, ham-like texture. For shorter storage, this usually isn’t a concern.
Print
Sous Vide Steak Recipe
- Prep Time: 20 minutes
- Cook Time: 3 hours 35 minutes
- Total Time: 3 hours 55 minutes
- Yield: 1 large steak (2 servings)
Description
Sous vide steak with precise, edge-to-edge doneness and a juicy interior. You set the exact temperature you want, and the steak comes out precisely at that doneness. It’s simple, reliable, and much more forgiving than cooking entirely over direct heat.
Ingredients
For the steak in a bag:
- 1 naturally tender steak, such as filet mignon, ribeye, or strip steak, preferably 1-2 inches (2.5–5 cm) thick
- salt, 1% of the steak’s weight (see instructions for a 12 oz / 340 g example)
- finely ground black pepper (optional), a generous pinch, or to taste
- garlic powder (optional): A generous pinch, or to taste
- fresh herbs (optional): A few sprigs of thyme or rosemary.
For the final sear in a pan:
- 2 tablespoons (30 ml) high-smoke-point oil or fat (I recommend refined avocado oil; see Notes for alternatives)
For the garlic-herb compound butter (for serving):
- 1/2 stick (56 g) of unsalted butter
- 1/2 tablespoon finely chopped fresh rosemary or 1/2 teaspoon dried rosemary
- 1/2 tablespoon finely chopped fresh parsley or 1/2 teaspoon dried
- 2 garlic cloves, finely chopped or pressed
- 1/8 teaspoon salt (a generous pinch), or more to taste
- A generous pinch of finely ground black pepper (about 1/8 teaspoon), or to taste
Tools:
- Sous vide machine (immersion circulator)
- Heat-safe food container or pot
- BPA-free bags suitable for sous vide
- Vacuum sealer (optional)
- Cast-iron skillet; alternatively, a hot grill or culinary torch
- Meat thermometer (optional)
Instructions
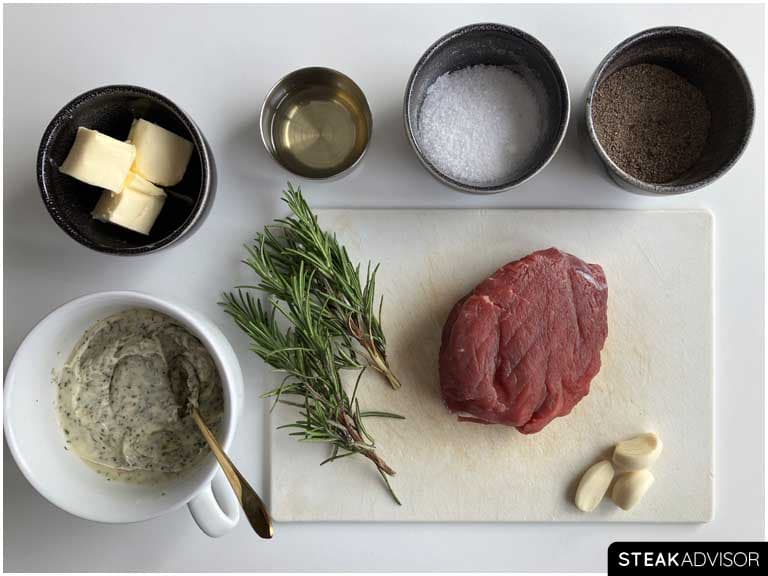
Choose the Target Temperature
- First, decide how you want your steak cooked. With sous vide, the temperature of the water bath determines the steak’s final doneness. For example, for medium-rare at 137°F (58°C), set the water bath to 137°F (58°C).
- Use the ranges below as a guide:
Very Rare to Rare: 118-128°F (48-53°C)
Medium-Rare: 129-139°F (54-59°C)
Medium: 140-149°F (60-65°C)
Medium-Well: 150-155°F (66-68°C)
Well-Done: 156°F+ (69°C+)
- For well-marbled cuts like ribeye or New York strip, I recommend 135-137°F (57-58°C).
- For leaner cuts like filet mignon, many people prefer 129-131°F (54-55°C) for a more tender, juicy result.
Determine the Cooking Time
- For a refrigerated, naturally tender steak such as ribeye, New York strip, or filet mignon, cook for at least:
1 inch (2.5 cm): 1 hour 15 minutes
1 1/2 inches (3.8 cm): 2 hours 20 minutes
2 inches (5 cm): 3 hours 35 minutes - These are minimum heat-through times and do not guarantee pasteurization.
- For frozen steaks, other thicknesses, tougher cuts, or pasteurization times, click or tap the Sous Vide Steak Cooking Time Calculator link to find the recommended cooking time for your steak.
Preheat the Water Bath
- Fill the container with water, keeping it between the circulator’s minimum and maximum fill lines. Set the circulator to your chosen temperature and preheat the water bath.
- While the water bath preheats, continue with the seasoning instructions below.
Season the Steak
- Pat the steak dry with paper towels.
- Season all over, including the edges, with salt equal to about 1% of the steak’s weight. For a 12-ounce (340 g) steak, that’s 0.12 oz (3.4 g) , or roughly:
1 1/4 teaspoons Diamond Crystal kosher salt,
3/4 teaspoon Morton kosher salt,
or 1/2 teaspoon table salt. - If using black pepper and garlic powder, sprinkle a generous pinch over each side of the steak, or season to taste.
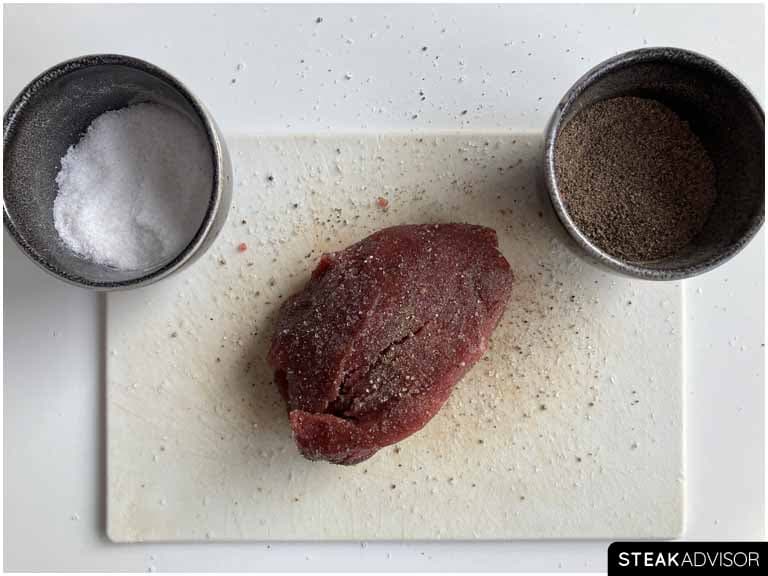
Bag and Seal the Steak
- Place the seasoned steak in a sous vide-safe bag.
- If using fresh herbs, place a few sprigs on both sides of the steak, then vacuum-seal the bag.
- If using a zip-top bag, slowly lower it into the water, keeping the opening above the surface. Seal just above the waterline, removing as much air as possible so the steak stays submerged.
Cook the Steak Sous Vide
- Once the water bath reaches the target temperature, place the sealed bag in the water.
- Make sure it isn’t blocking the circulator’s intake or outlet. Keep the steak fully submerged, weighing down or clipping the bag in place if needed.
- Cook for the time recommended by the Sous Vide Steak Cooking Time Calculator. If you selected pasteurization, follow the longer time provided.
- Note: For food safety, do not leave steaks in a water bath below 130°F (54°C) for more than 2 hours.
Make the Garlic-Herb Compound Butter
- Cut the butter into small pieces and place it in a bowl. Let it soften at room temperature until it’s easy to mix but not melted.
- To speed things up, microwave it in a microwave-safe bowl in 5-second intervals, checking after each interval.
- Add the rosemary, parsley, garlic, salt, and black pepper. Mix with a fork until evenly combined, then taste and adjust the seasoning.
- Cover and refrigerate until ready to use.
Remove Steak From Bag
- Once the steak has cooked for the time you planned, remove it from the bag and pat it completely dry on all sides with paper towels.
- Place it uncovered on a wire rack set over a rimmed baking sheet and refrigerate for 15-20 minutes before searing. No wire rack? Stand the steak on its edge on a plate.
- This brief chill lowers the steak’s temperature slightly and dries the surface, giving you more time to develop a deep crust without risking overcooking it.
- For steaks 2 inches (5 cm) thick or more, chill for an additional 5-10 minutes. For steaks around 1 inch (2.5 cm) thick, or when searing quickly over an open flame, reduce the chilling time slightly.
Sear the Steak
- About 15 minutes before searing, remove the compound butter from the refrigerator and let it soften slightly at room temperature.
- Tip: Turn on the exhaust fan and crack a window before you begin. A very hot pan produces a lot of smoke and can easily set off the smoke alarm.
- Heat a skillet over medium-high heat for 3-4 minutes.
- Add 2 tablespoons of high-smoke-point oil and heat for 1 minute, until the oil just begins to smoke.
- While the pan heats, pat the steak completely dry again with paper towels. The drier the surface, the better the crust.
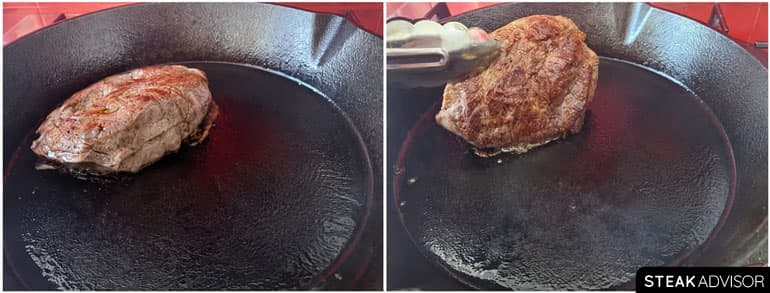
- Sear the steak for 2 minutes total, flipping every 30 seconds.
- Optional: If the steak has a fat cap (like a strip steak or picanha), hold it fat-side down for 60-90 seconds, or until well browned. If it doesn’t have a fat cap, quickly sear the remaining edges for about 15 seconds.
- Note: If using a grill or torch instead of a skillet, keep the searing time as short as possible. The goal is to build a good crust without cooking the center any further.
- Use the 2-minute sear as a starting point. A longer chill may give you a little more time, but the ideal searing time depends on the steak’s thickness, target doneness, and heat intensity. Adjust carefully for your setup, and test longer sears on a less expensive steak first.
Serve the Steak
- Top the steak with compound butter as soon as it leaves the pan, then serve immediately with your favorite sides. No resting is needed.
- Note: Sous vide steak loses heat quickly after searing, so have your sides ready beforehand. Sear, plate, and serve without delay.
Notes
Salt: Use salt equal to about 1% of the steak’s weight. For 12 oz (340 g) of steak, that’s about 1 1/4 teaspoons Diamond Crystal kosher salt, 3/4 teaspoon Morton kosher salt, or 1/2 teaspoon table salt.
The cook time shown in this recipe card is based on a refrigerated, 2-inch (5 cm) thick steak. For other thicknesses, refer to the cooking-time table above or click or tap the https://steakadvisor.com/steak-cooking/how-long-to-sous-vide-a-steak/ link.
Oil or fat alternatives: If you don’t have refined avocado oil, use refined high-oleic safflower oil, high-oleic canola oil, regular refined canola oil, refined olive oil, refined peanut oil, or clarified butter (ghee). Do not use regular butter for searing – it burns at high heat.
Important! If you drop the temperature below 130°F (54.4°C), you’re entering the food safety danger zone where harmful pathogens may survive. Because of that, you shouldn’t cook the food at those temperatures for more than 2 hours. For wild game, it’s especially important to cook the steak at a high enough temperature to kill potential parasites or bacteria.
For more details and tips on cooking steak sous vide, see the FAQs above the recipe card.

I have used the souv vide many times to cook meats. It’s to the point where my wife would rather have one of my steaks than go to a high end steakhouse. But tonight I had to make a $30/lb 1.75″ thick NY Strip and didn’t want to screw it up. So, i came here for timing advice.
i left with a new trick. After completing the immersion, stick the steak on a wire rack and in the fridge for 15-20 minutes. Absolute genious! Best steak I have ever made.
Thanks for the kind comment. Really happy to hear it turned out that well.
Easy to follow, and the steak came out exactly how I wanted. The final sear made it perfect.
Thanks, Matt. Great to hear.
Not gonna lie, sous vide feels like cheating. Steak came out exactly how I wanted inside, then I just blasted it in the pan for the crust.
That’s the beauty of sous vide. Thanks, Mike.
Sous vide is still my favorite method when I want a thick steak cooked exactly how I like it. The quick sear at the end is the only part that really needs attention.
Thanks for the comment. Sous vide is hard to beat for control.
Loved the detailed instructions, this may sound dumb but once you set the temperature, How long does it take to reach the internal temperature like with a Boneless 3/4″ Rib Eye? or does it automatically stop at desired temperature, I’m a real new bee and didn’t see times for the bath. Thank you for this post.
Great question! For a boneless 3/4-inch (1.9 cm) ribeye, the exact bath time depends on your water temperature, desired doneness, and whether you want the steak pasteurized or just brought up to temperature.
For the most accurate time, use my sous vide steak time calculator here: https://steakadvisor.com/steak-cooking/how-long-to-sous-vide-a-steak/
The sous vide machine keeps the water at your set temperature, so the steak gradually comes up to that temperature and won’t rise above it while it stays in the bath. That means you don’t have to pull the steak out the second it reaches the target temperature. You can usually hold it there for a while, even a few extra hours, without overcooking it in the traditional sense. Just keep in mind that the texture will continue to change over time. I explain this in more detail in this article.
That said, for steaks thinner than about 1 1/4 inches (3.175 cm), I usually recommend classic pan-searing instead. It’s quicker and gives you a better crust. Here’s my thin steak recipe: https://steakadvisor.com/steak-cooking/how-to-cook-thin-steak/