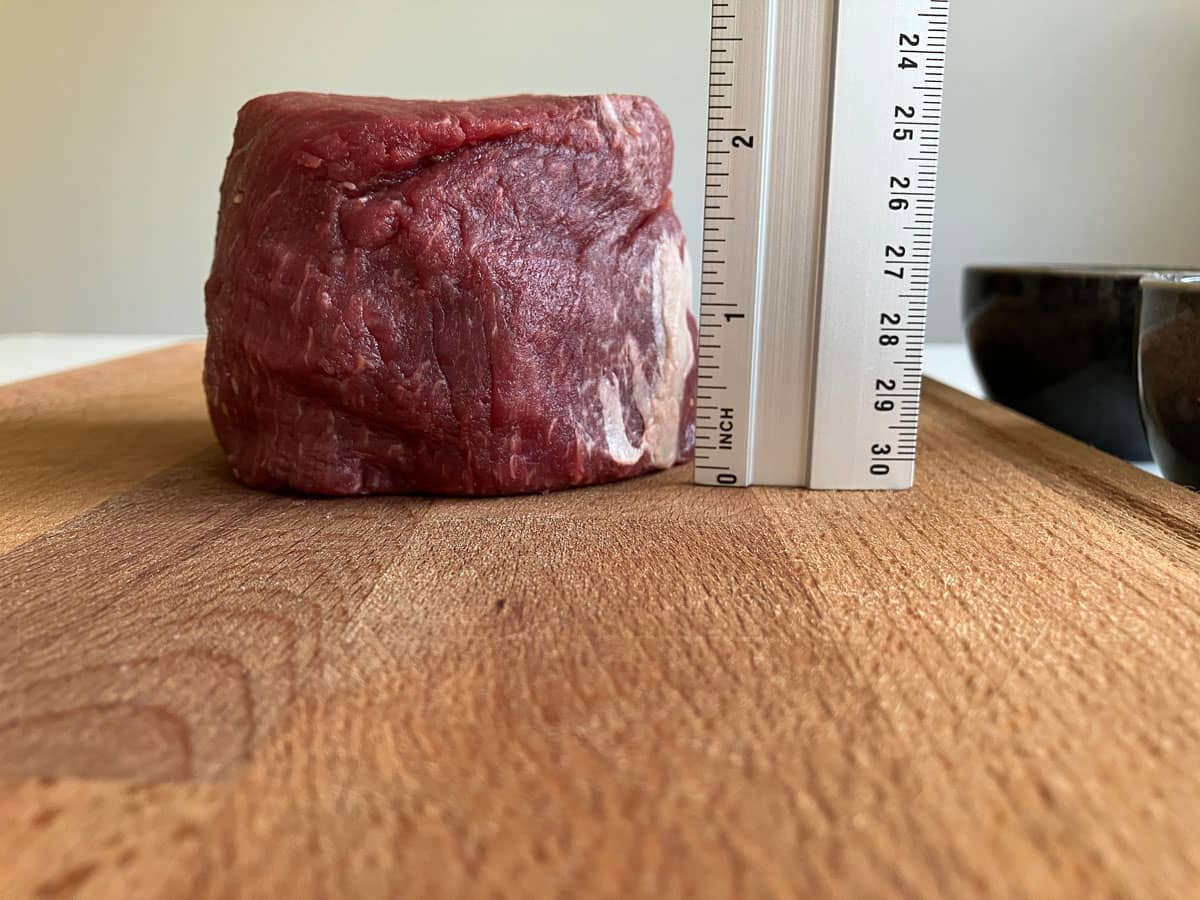

For a thick steak (at least 2 inches / 5 cm), I use one of three methods: a traditional sear (known as a forward sear), a reverse sear, or sous vide.
If I want the fastest method, I use a forward sear. If I want the most even doneness from edge to edge without specialized equipment, I reverse sear it. And if I want the most precise temperature control, I use sous vide.
Here’s how the three methods compare and where each one works best.
Thick Steak Cooking Methods at a Glance
The comparison below is based on a 2-inch-thick (5 cm) steak cooked to medium-rare.
| Method | Best For | Approx. Cooking Time | Equipment | Main Trade-Off |
| 1. Forward sear | Cooking very thick steaks faster | About 30 minutes | Pan + oven/grill + thermometer | Slightly thicker gray band |
| 3. Reverse sear | Even doneness without special equipment | About 1 hour total | Oven/grill + pan + thermometer | Takes about twice as long as forward searing |
| 3. Sous vide | Precise doneness every time | About 4 hours total | Sous vide + pan/grill | Requires specialized equipment |
Why Thick Steaks Need a Different Cooking Approach
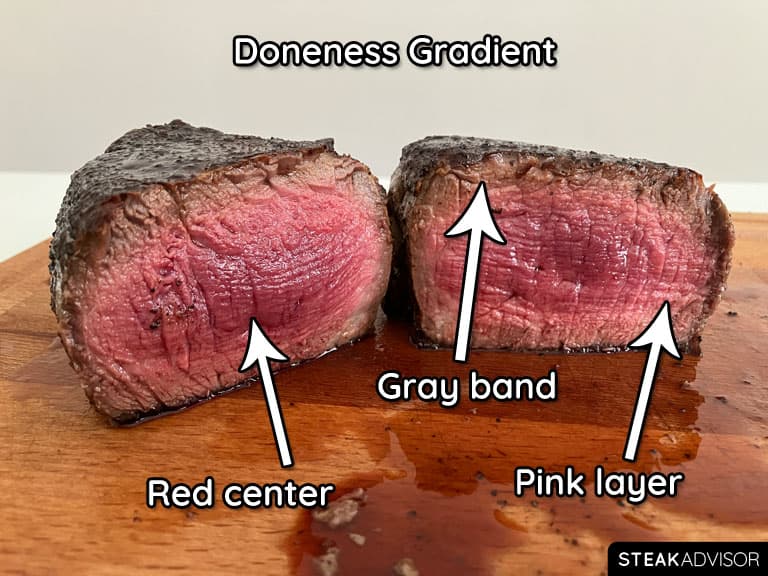
You can’t cook a steak that’s about 2 inches (5 cm) thick over direct, high heat from start to finish and expect it to cook evenly. With a steak this thick, very high heat cooks the outer layers much faster than heat can move toward the center. Instead of an evenly cooked interior with only a thin gray band, you get a strong doneness gradient: a thick gray layer under the crust, a pink layer closer to the middle, and a red center.
That’s why thick steaks need a two-step approach: one stage to cook the center evenly and another to build a deep, browned crust.
The photo below shows a filet mignon over 2 inches (5 cm) thick cooked entirely in a skillet. You can clearly see the gradient from gray near the surface to red in the center.
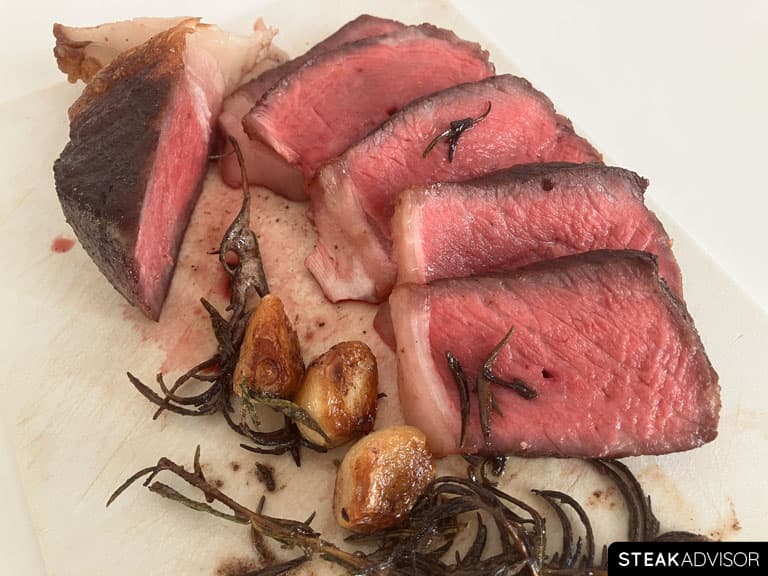
For comparison, the photo below shows what a thick steak looks like when it’s cooked evenly from edge to edge.
3 Ways to Cook a Thick Steak
1. Forward Searing
(Best for: Cooking very thick steaks faster)
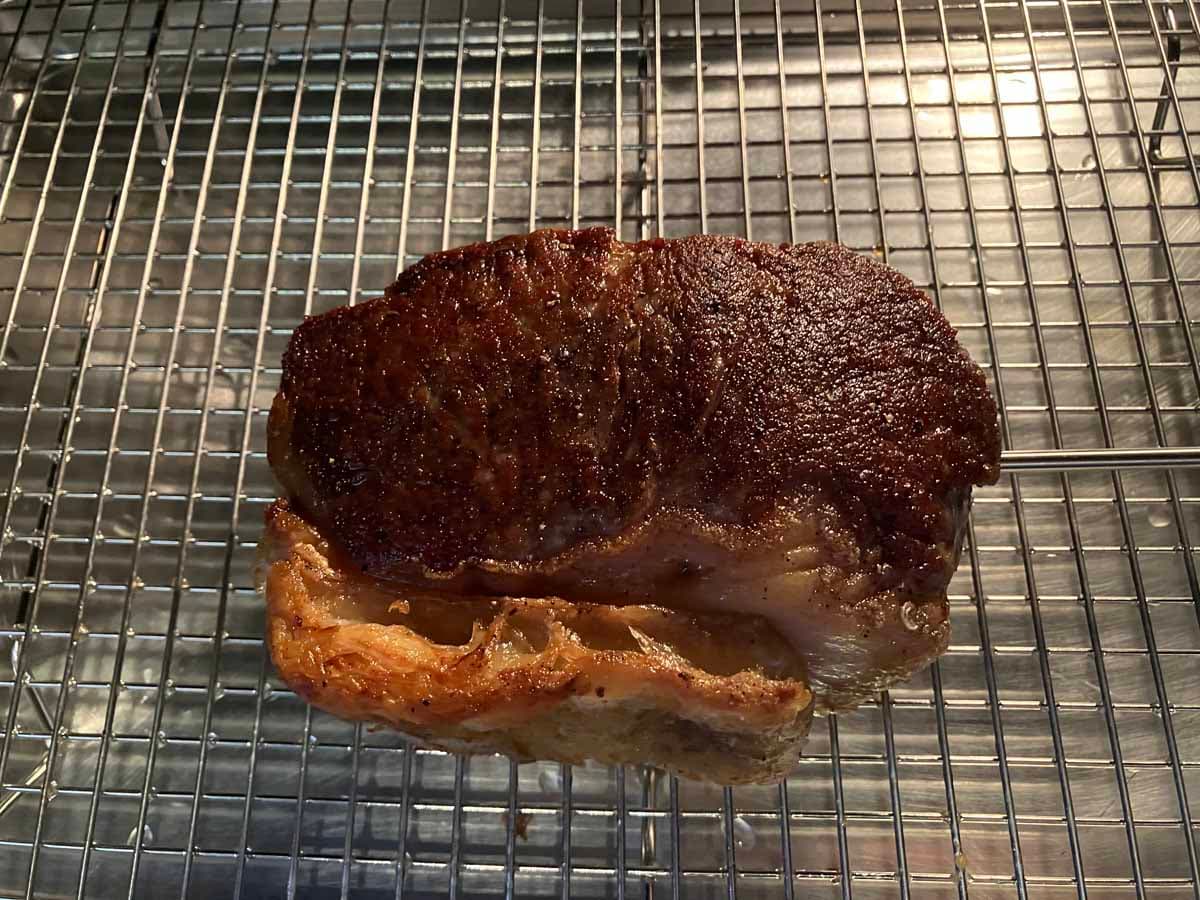
About This Method: Forward searing is a two-step way to cook a steak. You start by searing it over high heat to build a deep, flavorful crust, then finish it at a lower temperature until it reaches your desired doneness. The traditional method uses a skillet and oven, but you can do the same thing on a grill or smoker by searing over direct heat first, then moving the steak to indirect heat.
Pros: It’s straightforward, builds a deep crust, gives you fairly even doneness throughout the steak, and makes it easy to gently bring the steak up to the target internal temperature over lower heat.
Cons: It leaves a slightly thicker gray band than reverse searing or sous vide. On a grill, you’ll need a two-zone setup so you can sear the steak over direct heat first, then finish it over low indirect heat.
Cook Time: About 30 minutes for a 2-inch / 5 cm steak cooked to medium-rare
My Take: Forward searing is my favorite way to cook a really thick steak, especially one that’s well over 2 inches (5 cm) thick. It offers the best balance of cooking time and results. Yes, you get a slightly thicker gray band under the crust than you do with reverse searing or sous vide, but with a steak this thick, I simply don’t care. In about 30 minutes, I can get a steak that’s cooked fairly evenly throughout and still has a seriously deep crust. That’s pretty amazing.
What I also love about forward searing is that the steak finishes at a low temperature, so there’s very little carryover cooking. That makes it extremely easy to hit the exact doneness you want. Finish the steak in a 225°F (110°C) oven, and you’re looking at roughly 5°F (3°C) of carryover. That’s it.
One more thing I really like is that you can top the steak with a little butter while it finishes over low heat. It melts right over the steak and gives you an easy boost of flavor without having to butter-baste it or do anything else.
It’s a little harder to pull off on a grill, especially over charcoal, but if you’re good at managing the heat, you get another big advantage: that incredible smoky flavor.
2. Reverse Searing
(Best for: Even doneness without special equipment)
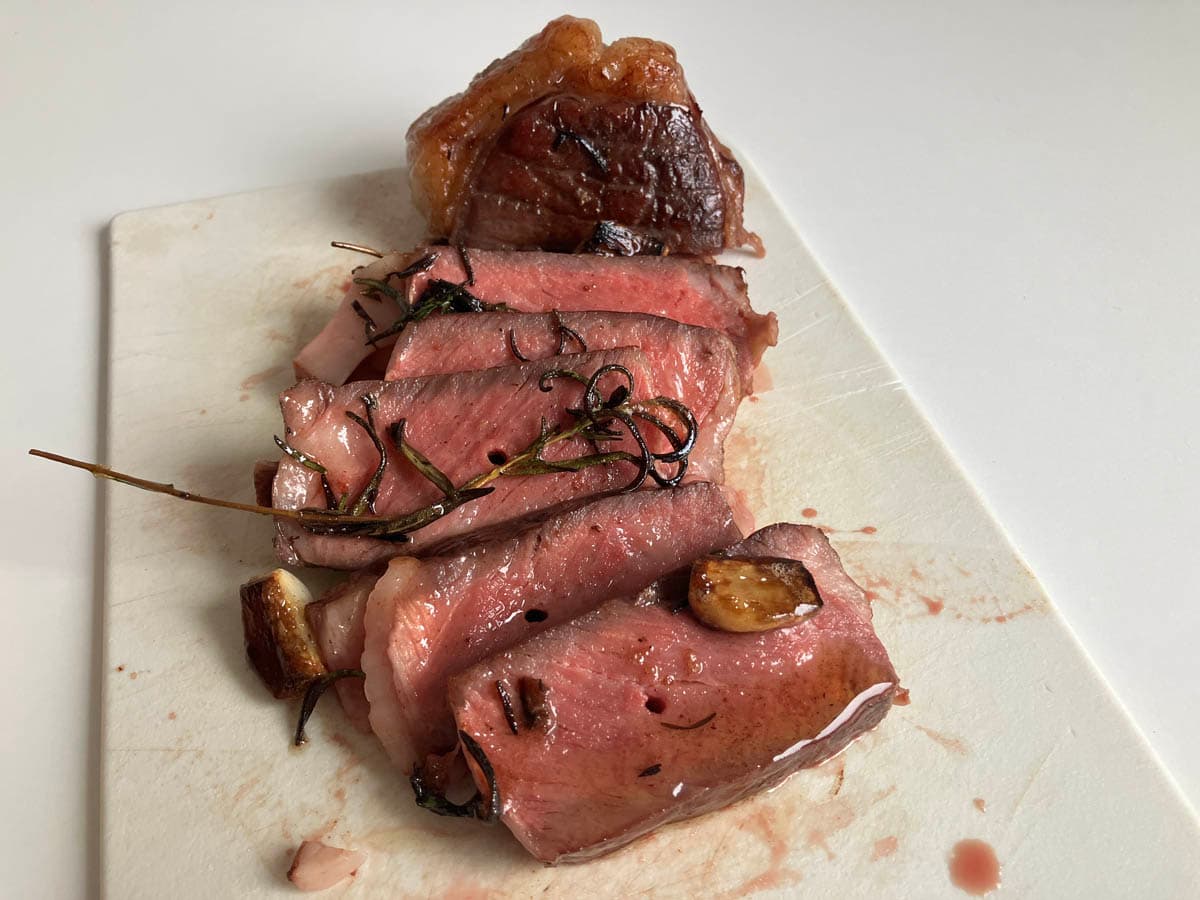
About This Method: Reverse searing starts with the steak over low heat, where it cooks slowly until it reaches the pull temperature for the final sear. Then it gets a quick sear over high heat to build a crust. Most people do this in the oven and finish in a hot skillet, but the same method works on a grill or smoker.
Pros: It’s easy to do, cooks the steak very evenly from edge to edge, leaves almost no gray band, builds a decent crust, and needs very little attention during the low-heat stage.
Cons: It takes roughly twice as long as forward searing. You also need to pull the steak from the low-heat stage early enough to account for the temperature rise during the final sear.
Cook Time: About 1 hour total for a 2-inch / 5 cm steak cooked to medium-rare
My Take: I know reverse searing is one of the most popular steak-cooking methods right now, but I prefer it when I’m cooking outdoors on the grill. I like the extra smoky flavor, and a two-zone fire makes the method simple: cook the steak slowly over indirect heat, then move it directly over the coals for the final sear. Indoors, I still prefer forward searing for the deeper crust, shorter cook time, and how easy it is to hit my target doneness, or sous vide when I want insane precision and completely hands-off cooking.
3. Sous vide
(Best for: Precise doneness every time)
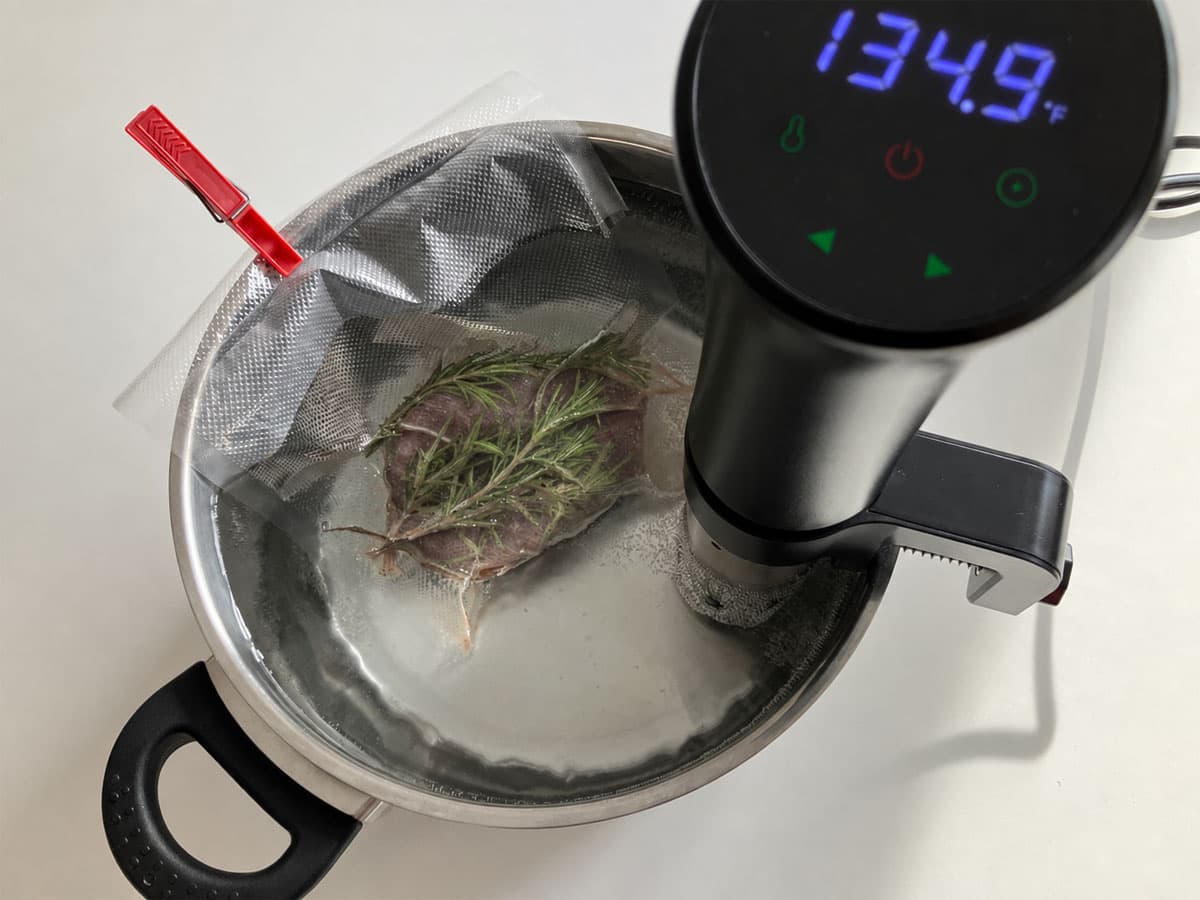
About This Method: Sous vide cooks the steak in a temperature-controlled water bath. You seal the steak in a bag, set the water to your target temperature, and let it cook until it’s evenly done all the way through. Once it’s ready, you finish it with a fast, high-heat sear to build a deep crust.
Pros: It’s one of the easiest ways to cook a thick steak, brings it precisely to your target temperature, cooks it evenly from edge to edge, and requires almost no attention until the final sear.
Cons: You need dedicated equipment, thick steaks take several hours to cook, and because the steak comes out of the bath already at your target temperature, too much time over high heat during the final sear can easily overcook it.
Cook Time: About 4 hours total for a 2-inch / 5 cm steak cooked to medium-rare
My Take: Sous vide is my go-to when I want perfectly even doneness from edge to edge, especially with a well-marbled steak. What I like most is how flexible it is. I put the steak in the water bath, focus on everything else, and sear it when I’m ready to serve. Once it reaches the set temperature, I have a wide window to finish the rest of the meal before I sear the steak.
The only part I really have to watch is the final sear. If I take the steak straight from the bath and throw it into a ripping-hot pan, I’ll overcook. I let it cool slightly first, pat it completely dry, and keep the sear short so I don’t overshoot my target doneness.
The downside is time. Sous vide takes several hours with a steak this thick, so it’s by far the longest method here. But almost all of that time is hands-off, which gives me plenty of time to make the sides. Once everything else is ready, I sear the steaks and serve.
