
| PREP TIME | REST TIME | COOK TIME |
| 10 mins | 1 to 4 h | 40 mins |
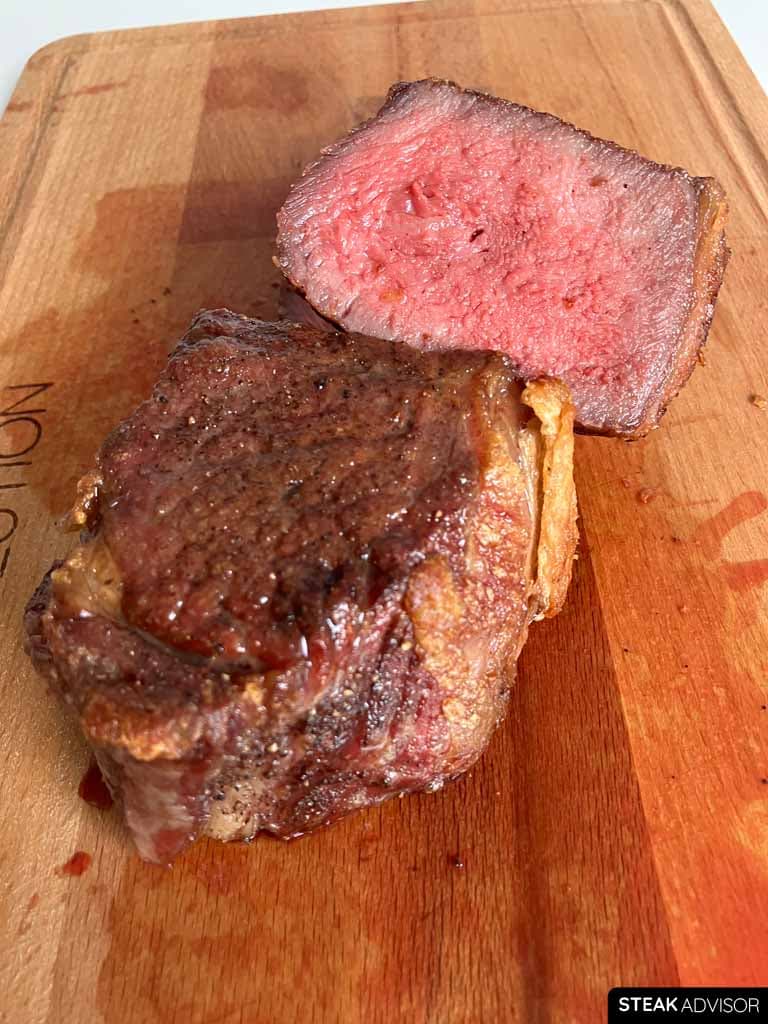
Dry-aged steak cooks faster than a regular steak, and when cooked incorrectly, it’s easier to overcook or end up with a very thick, gray band just under the crust. This recipe fixes those problems. Using my method, you’ll get a dry-aged steak that’s evenly cooked from edge to edge, with only a minimal gray band and a perfectly seared crust. Best of all, it’s simple and reliable enough that anyone can get it right on the first try.
In this recipe, I’ll show you how to cook a dry-aged steak using the reverse sear method. We’ll start low and slow in the oven, which helps the steak cook evenly from edge to edge. Then, transfer it to a very hot pan to build that beautiful crust. Finally, we’ll finish it with a garlic-herb butter mixture or, if you prefer, a slice of compound butter right before serving.
What Makes This Recipe Perfect for Dry-Aged Steak?
Dry-aged beef cooks a bit differently from fresh and wet-aged steak. As it ages, the meat slowly loses moisture (most of it during the first 3–4 weeks). After 1–2 months, the total loss of density of aged meat (edible interior part) is usually around 5%. That doesn’t sound like much, but it makes a noticeable difference in how the steak cooks.
One of the biggest challenges with dry-aged steak is the gray band that forms around the edges. When cooked over intense heat, the steak develops a thicker gray band just under the crust. In my side-by-side tests (using the same thickness, target temperature, and pan-searing method), regular steaks came out fine, while dry-aged ones consistently had a bigger gray band inside. I tested every trick I knew to reduce it. All of them worked with regular steaks (whether fresh or wet-aged), but none of them worked on dry-aged beef. Finally, I tested the reverse sear method, starting low and slow in the oven, then finishing quickly in a very hot pan for a crust. The difference was clear: the gray band was significantly smaller.
So, if you want to cook dry-aged steak with minimal gray band, low-and-slow is the way to go. I can’t fully explain the science behind why this works, but after running the tests many times, the results speak for themselves. That’s why this has become my go-to method for dry-aged steak.
You can cook a dry-aged steak sous vide or on a grill with indirect heat. However, in my opinion, this recipe is the best option for most people: it’s easy, requires no special tools, works indoors regardless of the weather, and guarantees a great result. Best of all, cooking the steak in the oven first dries the surface, making it perfect for achieving a beautiful, flavorful crust in the pan.
The Ingredients You’ll Need
- Steak: At least 1 inch (2.5 cm) thick, ideally 1 1/2-2 1/2 inches (3.8-6.4 cm) or more
- High-smoke-point oil: 1–2 tablespoons (15–30 ml), I recommend refined avocado oil
- Kosher salt: 1 teaspoon
- Black pepper: 1/2 teaspoon
- Fresh herbs: A few sprigs of thyme or rosemary
- Garlic: 2–3 cloves
- Unsalted butter: 2 tablespoons (28 g)
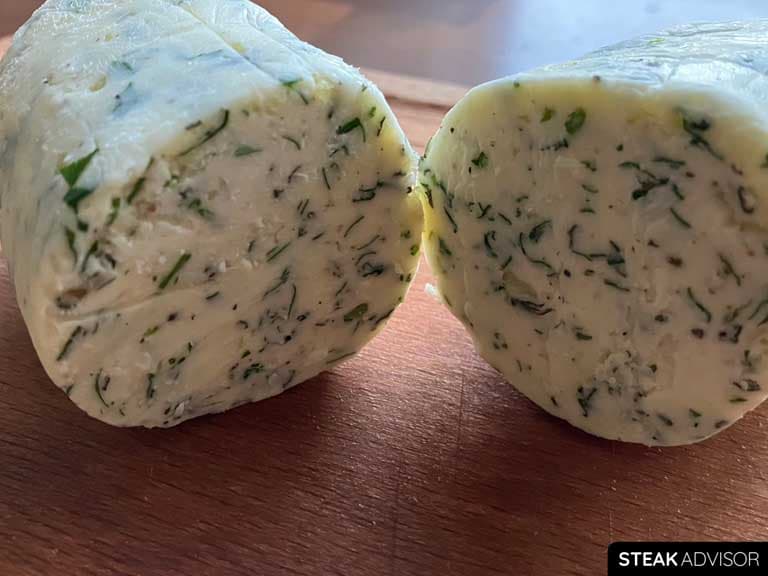
Note: Instead of butter, garlic, and fresh herbs, you can use compound butter. Simply place a thin slice over the steak immediately after searing, and it’ll melt into the meat, adding the same rich flavor with less effort.
The Tools You’ll Need
- Pan: Cast-iron, carbon steel, or heavy-bottomed stainless steel skillet
- Oven-safe wire rack and baking sheet: To place the steak on while it cooks in the oven
- Tongs: For flipping and handling the steak safely
- Meat thermometer: A leave-in probe thermometer is best for oven cooking, but an instant-read thermometer works too
How to Cook Dry-Aged Steak – Step by Step Photos
Start by gathering all of your ingredients and tools, then follow the steps below. I’ve included extra tips along the way to help you get the best results, even if it’s your first time cooking dry-aged steak.

Step 1: Prepare the Steak
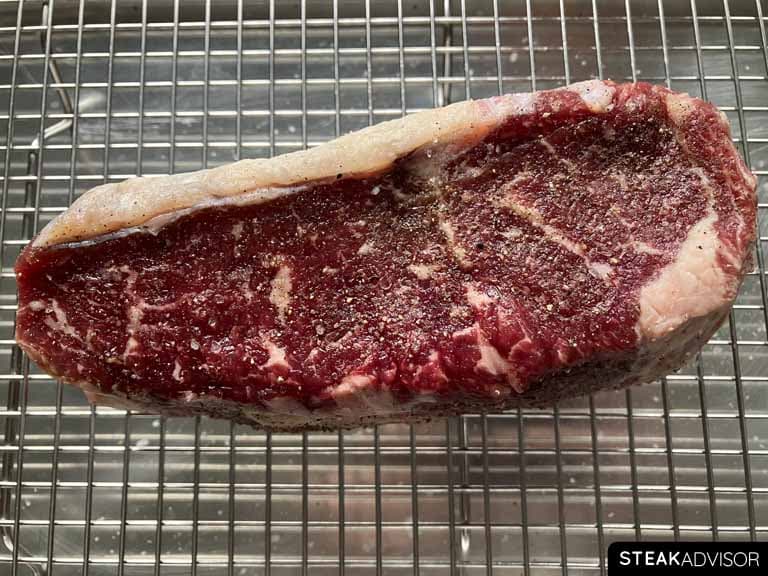
Season the steak generously with kosher salt and finely ground black pepper on all sides, including the edges. Place it on a wire rack set over a rimmed baking sheet and refrigerate it uncovered for at least 1 hour, or ideally for about 4 hours to achieve a deeper flavor. Avoid salting the steak for longer than 4 hours. The longer it sits salted, the more likely it is to form a thicker gray band under the crust.
Note
The goal of this recipe is to achieve a steak that’s evenly cooked inside with a beautifully browned crust on the outside. From my tests, leaving a salted steak longer than 4 hours (such as overnight) does deepen the flavor, but it also creates a noticeably thicker gray band inside. That’s why I recommend a maximum of 4 hours of dry brining for this recipe. Don’t worry, 4 hours is more than enough to significantly improve the meat’s flavor.
Place the steak on a wire rack set over a rimmed baking sheet, ideally an oven-safe one so you can transfer the steak and rack directly into the oven later. Why use a rack? Because it allows air to circulate around the steak, drying the surface more evenly. A drier surface means better browning when you sear the steak.
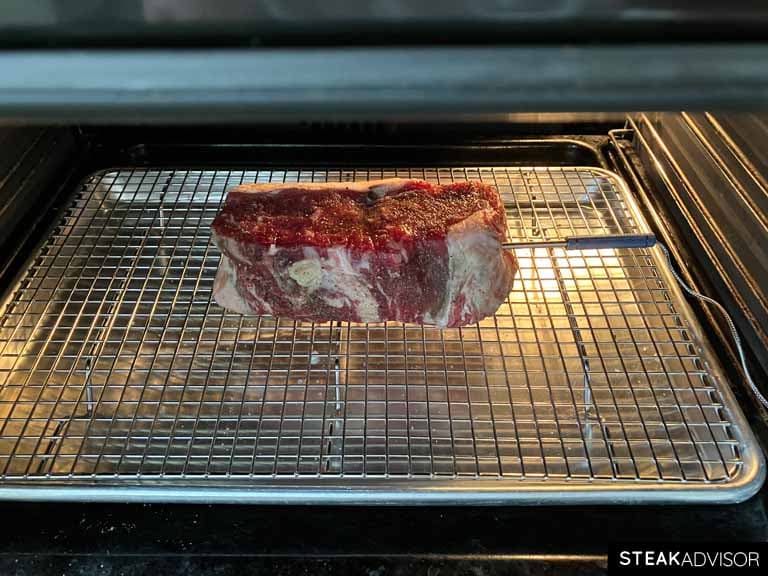
Step 2: Slow-Cook the Steak in the Oven
Preheat the oven to 225°F (107°C). Transfer the baking sheet with the wire rack and steak into the oven, and cook until a meat thermometer reads about 20°F (11°C) below your target doneness (for example, around 115°F/46 °C if you’re aiming for medium-rare). Then, remove the steak from the oven. At this point, the steak won’t look appetizing. The next step, a quick sear, will fix this by forming a beautiful crust and bringing the steak to its final temperature.
The cooking time in the oven varies significantly depending on the steak’s thickness, so please don’t rely on the clock. The best option is to invest in a good leave-in probe thermometer. Insert the probe from the side so it reaches the very center of the steak, then set an alarm for your target temperature. If you only have an instant-read thermometer, start checking after about 20 minutes for thinner steaks and 30 minutes for thicker cuts (if you’re going for medium-rare).
Here’s a simple temperature chart showing when to remove the steak from the oven to reach your preferred doneness:
| Doneness | Remove at temp: | Final temp after searing: |
| Rare | 100–110°F (38–43°C) | 120–130°F (49–54°C) |
| Medium Rare | 110–120°F (43–49°C) | 130–140°F (54–60°C) |
| Medium | 120–130°F (49–54°C) | 140-150˚F (60–66°C) |
| Medium-Well | 130–140°F (54–60°C) | 150-160˚F (66–71°C) |
| Well Done | 140–150°F (60–66°C) | 160°F+ (71°C+) |
Note
Using a wire rack isn’t optional; it’s key to getting this recipe right. First, it keeps air circulating around the steak, which means the meat dries evenly in the oven. That drier surface is exactly what helps you achieve a better crust during the sear. Second, it prevents uneven cooking. When the steak sits directly in a hot pan while in the oven, the bottom absorbs too much heat and cooks faster, while the top dries out more. A simple wire rack solves both issues and guarantees both sides cook evenly.

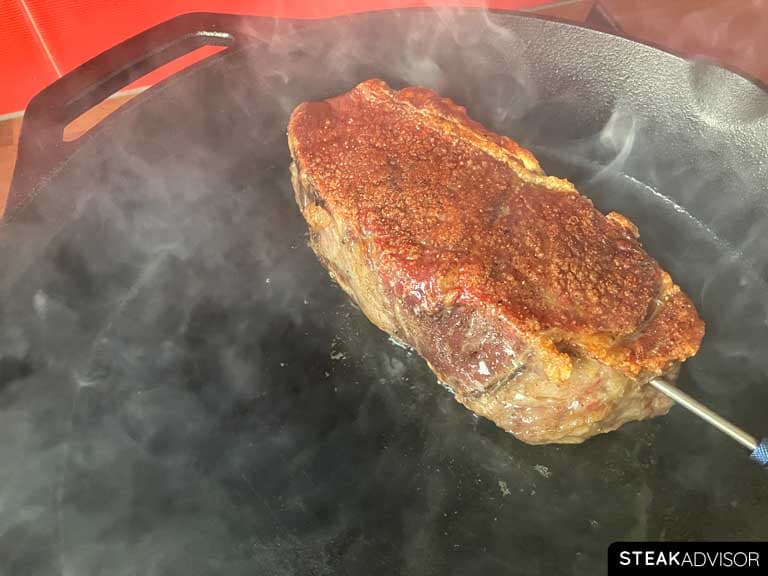
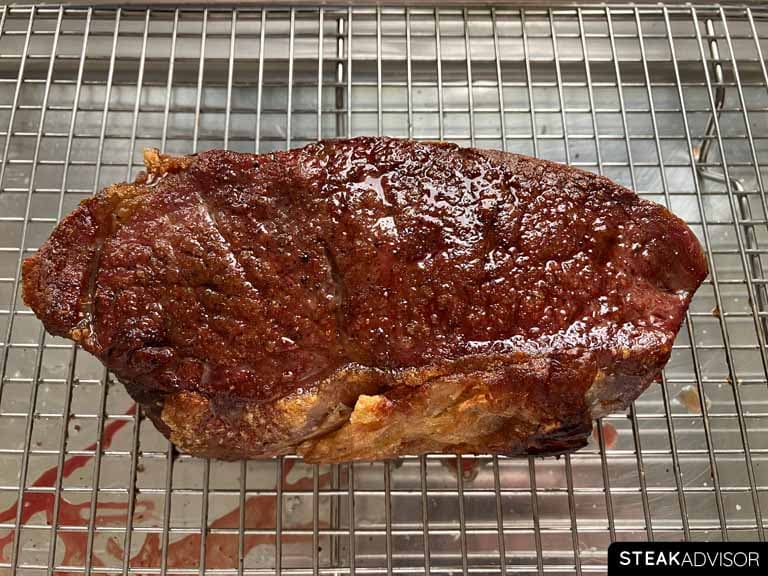
Step 3: Sear the Steak for a Crust
Place a cast-iron, carbon steel, or heavy stainless steel skillet over high heat and let it heat for about 3-4 minutes. Add 1–2 tablespoons of high-smoke-point oil and heat for another minute. Use 1 tablespoon for well-marbled cuts and 2 tablespoons for leaner cuts.
Once the pan is hot, place the steak inside and sear it, flipping every 30 seconds for about 2 minutes in total (roughly 1 minute per side, with a total of 4 flips). Each time you flip the steak, gently press it with tongs to ensure even contact with the pan’s surface. Optionally, you can also sear the edges for up to 30 seconds. When done, remove the steak from the pan and move on to the aromatics.
Note
After the oven step, the steak’s surface is already very dry, which means it will sear beautifully. For a hard sear, use a pan that can handle very high heat, ideally around 450–500°F (232–260°C) and a high-smoke-point oil.
Keep the sear short and controlled. We want to keep the gray band inside as small as possible. That’s why the sear should last no more than 2 minutes total, with flips every 30 seconds. This method minimizes overcooking and keeps carryover-temp under control. Remember, you’ve already removed the steak from the oven at about 20°F (11°C) below your target doneness. A short, hot sear will raise the temperature just enough to hit your final doneness without overshooting. Searing too long is the #1 reason reverse-seared steak ends up overcooked.

Step 4: Prepare the Aromatics
In the same hot pan, add a few sprigs of fresh herbs and peeled garlic cloves. Keep the heat at medium-high and sear the garlic until it turns lightly golden brown. Then reduce the heat to medium-low, add the butter, and let it melt together with the aromatics. Once the butter mixture is ready, move on to the final step: serving.
Optional: Instead of preparing the garlic, herbs, and butter in the pan, you can simply place a thin slice of compound butter on top of the steak immediately after searing and let it melt. It’s an easier method, but it does require making the compound butter in advance.
Note
To keep things simple and avoid the risk of overcooking, I separate the preparation of the aromatics from searing the steak. Many people do both at the same time, but with reverse searing, the margin for error is too small, so I prefer to split these steps. Don’t worry, the results are still fantastic. Also, remember that butter has a low smoke point, so always reduce the heat to medium-low before adding it.

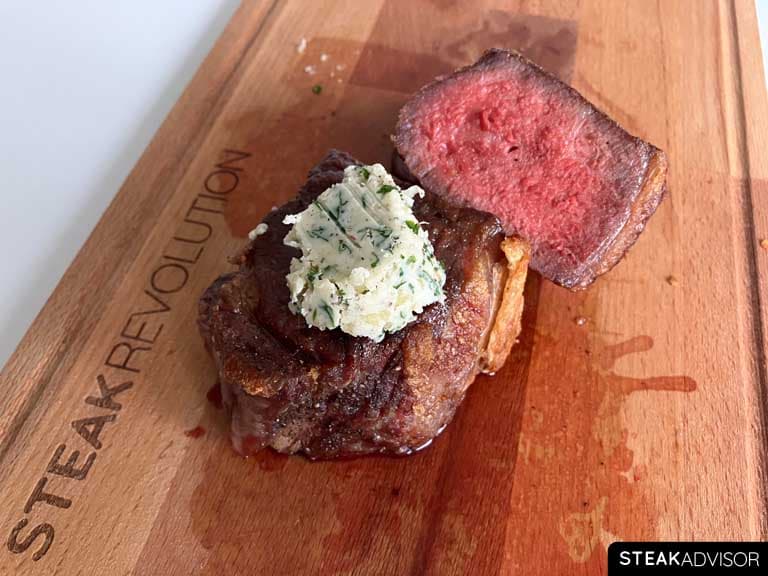
Step 5: Serve Immediately
Slice the steak thinly, then pour the melted butter from the pan over the top just before serving. Don’t forget the leftover herbs and seared garlic; add those too for extra flavor. Unlike most pan-seared steak recipes, you don’t need to let the steak rest after searing with this reverse sear method. If you skip the aromatics, simply slice the steak immediately after searing and serve it right away.
FAQs
Do I need to let the steak rest at room temperature before cooking?
No. With the reverse sear method, you can skip the resting step. The steak starts cooking gently in the oven at a low temperature, so there’s no need to let it rest at room temperature first.
Is this recipe good for me if I like a well-done steak?
No. The goal of this recipe is to achieve an evenly pink interior with minimal gray band and a crisp crust on the outside. That balance is only possible when cooking steak up to medium doneness. Once you go beyond medium, the gray band becomes unavoidable. If you prefer your steak medium-well or well-done, you’ll get better results with a traditional pan-searing method instead of the reverse sear.
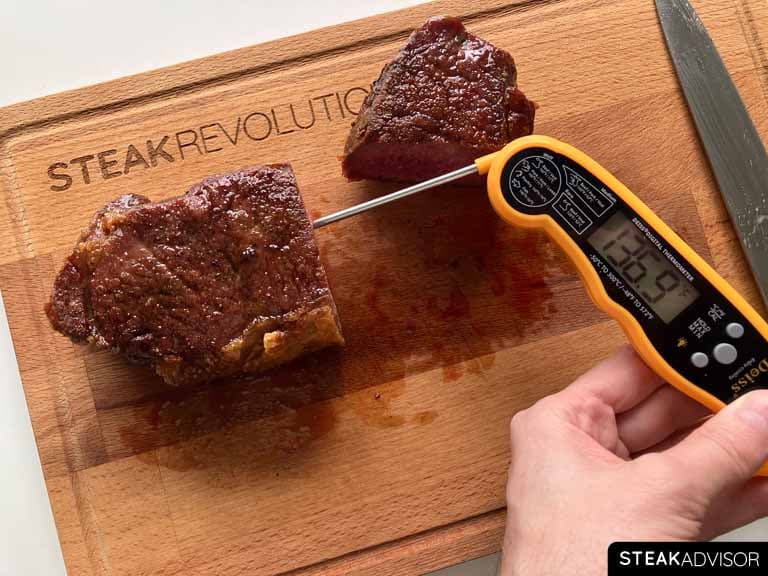
When’s the best time to take the steak out of the oven?
Remove the steak from the oven when it’s about 20°F (11°C) below your target doneness. For example, if you’re aiming for medium-rare (around 135°F / 57°C), remove the steak from the oven at about 115°F / 46°C. This prevents overcooking once you move on to the sear.
Below, I have included a steak temperature chart for this recipe:
| Doneness | Remove at temp: | Final temp after searing: |
| Rare | 100–110°F (38–43°C) | 120–130°F (49–54°C) |
| Medium Rare | 110–120°F (43–49°C) | 130–140°F (54–60°C) |
| Medium | 120–130°F (49–54°C) | 140-150˚F (60–66°C) |
| Medium-Well | 130–140°F (54–60°C) | 150-160˚F (66–71°C) |
| Well Done | 140–150°F (60–66°C) | 160°F+ (71°C+) |
With this recipe, you should expect a combined carryover increase of about 20°F (11°C). After leaving the oven, the steak’s temperature will rise by roughly 5°F (3°C) while it rests as you preheat the pan. Then, after searing in a very hot skillet, you’ll see another 10–15°F (5–8°C) rise. Depending on the steak’s thickness, oven temperature, and cooking time, this can vary slightly, but on average, you’ll see about a 20°F (11°C) rise from the moment you take it out of the oven until it’s finished in the pan.
What are the best cuts of steak for this recipe?
This recipe works best with steaks that are at least 1 1/2 inches (3.8 cm) thick – ideally over 2 inches (5 cm) thick. Avoid thinner cuts (under 1 inch / 2.5 cm), as they cook through too quickly in the oven and don’t leave enough time for a proper reverse sear. Thicker cuts give you the best balance between gentle oven cooking and a quick, high-heat sear. Some of the best choices include ribeye (boneless or bone-in, such as cowboy or tomahawk), strip steak, porterhouse or T-bone, and picanha.
Can I finish/sear the steak on a grill?
Yes. Preheat your grill as hot as possible, then follow the same rule as with pan-searing: place the steak over direct high heat and sear for about 2 minutes total, flipping every 30 seconds.
- Gas grill: Turn on all burners to high and place the steak directly over the hottest burner zone.
- Charcoal grill: Light a full chimney of charcoal and wait until the coals turn evenly gray with a thin layer of ash. Concentrate the coals into one spot to create the hottest zone, then sear the steak directly over the coals.
Dry-Aged Steak Recipe
- Prep Time: 10 minutes
- Rest Time: 1 to 4 hours
- Cook Time: 40 minutes
- Total Time: 50 minutes
Description
This reverse-sear dry-aged steak recipe gives you an evenly cooked interior with a minimal gray band and a crisp, flavorful crust. Starting low and slow in the oven and finishing with a quick, high-heat sear makes it foolproof even if it’s your first time cooking dry-aged steak.
Ingredients
For Steak:
- Steak (at least 1 inch/2.5 cm thick, ideally 1 1/2-2 1/2 inches / 3.8-6.4 cm or more)
- 1–2 tablespoons (15–30 ml) high-smoke-point oil
- 1 teaspoon kosher salt
- 1/2 teaspoon black pepper
- A few sprigs of fresh thyme or rosemary
- 2–3 garlic cloves
- 2 tablespoons (28g) unsalted butter
Tools:
- Pan (cast-iron, carbon steel, or heavy-bottomed stainless steel skillet)
- Oven-safe wire rack and baking sheet
- Tongs
- Meat thermometer (a leave-in probe thermometer is best for oven cooking, but an instant-read thermometer works too)
Instructions
- Prepare the Steak: Season the steak generously with kosher salt and finely ground black pepper on all sides, including the edges. Place it on a wire rack set over a rimmed baking sheet and refrigerate it uncovered for at least 1 hour, or ideally for about 4 hours to achieve a deeper flavor. Avoid salting the steak for longer than 4 hours. The longer it sits salted, the more likely it is to form a thicker gray band under the crust.
- Slow-Cook the Steak in the Oven: Preheat the oven to 225°F (107°C). Transfer the baking sheet with the wire rack and steak into the oven, and cook until a meat thermometer reads about 20°F (6°C) below your target doneness (for example, around 115°F/46 °C if you’re aiming for medium-rare). Then, remove the steak from the oven (see notes for temperature chart).
- The cooking time in the oven varies significantly depending on the steak’s thickness, so please don’t rely on the clock. The best option is to invest in a good leave-in probe thermometer. Insert the probe from the side so it reaches the very center of the steak, then set an alarm for your target temperature.
- If you only have an instant-read thermometer, start checking after about 20 minutes for thinner steaks and 30 minutes for thicker cuts (if you’re going for medium-rare).
- Sear the Steak for a Crust: Place a pan over high heat and let it heat for about 3-4 minutes. Add 1–2 tablespoons of oil and heat for another minute. Use 1 tablespoon for well-marbled cuts and 2 tablespoons for leaner cuts.
- Once the pan is hot, place the steak inside and sear it, flipping every 30 seconds for up to 2 minutes in total (1 minute per side, with a total of 4 flips). Each time you flip the steak, gently press it with tongs to ensure even contact with the pan’s surface. Optionally, you can also sear the edges for up to 30 seconds. When done, remove the steak from the pan and move on to the aromatics.
- Prepare the Aromatics: In the same hot pan, add a few sprigs of fresh herbs and peeled garlic cloves. Keep the heat at medium-high and sear the garlic until it turns lightly golden brown. Then reduce the heat to medium-low, add the butter, and let it melt together with the aromatics. Once the butter mixture is ready, move on to the final step: serving.
- (Optional) Instead of preparing the garlic, herbs, and butter in the pan, you can simply place a thin slice of compound butter on top of the steak immediately after searing and let it melt. It’s an easier method, but it does require making the compound butter in advance.
- Serve Immediately: Slice the steak thinly, then pour the melted butter from the pan over the top just before serving. Don’t forget the leftover herbs and seared garlic; add those too for extra flavor.
- Unlike most pan-seared steak recipes, you don’t need to let the steak rest after searing with this reverse sear method. If you skip the aromatics, simply slice the steak immediately after searing and serve it right away.
Notes
Note: Instead of butter, garlic, and fresh herbs, you can use compound butter. Simply place a thin slice over the steak immediately after searing, and it’ll melt into the meat, adding the same rich flavor with less effort.

Explore Other Guides:
- How to Pan-Sear Steak
- How to Cook Thin Steak
- How to Cook a Very Thin Steak (About 1/2-Inch / 1.27 cm thick)
- How to Cook a Very Thick Steak
- How to Dry Brine a Steak